The Secret To Achieving That Perfect Bowling Green Look

Written By An LSA Sports Turf Expert

Bowling Greens

Have you ever wondered how bowling green grass is maintained? Or have you wanted to create your own bowling green look in your garden? Well, here’s how it’s done…

What grass is used on bowling greens?

 Over the years bowling green surfaces have changed, but today the majority are Tifdwarf couch. Tifdwarf was bred by The University of Georgia in Tifton and have bred world-renowned ‘Tif’ couch grasses like TifTuf Hybrid Bermuda and TifEagle. Tifdwarf is a fine leaf hybrid variety first brought into Australia around 50 years ago. It is a popular turf variety that is used across many sporting surfaces including golf putting greens, tennis courts, croquet courts, and bowling greens. Tifdwarf has a good drought, heat, and shade tolerance can be mown low and tolerates heavy traffic. It has good rooting capabilities and tolerance for close mowing. Tifdwarf has a soft leaf with few seed heads making it an ideal choice for playing surfaces.

There are also now a range of new greens grade zoysia varieties in the early release stage including Primo Zoysia and Trinity Zoysia. These turf varieties are specifically bred for golf course greens and tees, both holding a dense growth habit.

Bowling green construction

Most bowling greens are 38m x 38m and constructed on a gravel base, with parallel drainage and at least 300-400mm of suitable sand growing profile. Each profile is carefully levelled with a final laser level on the surface. This helps ensure the playing surface has a billiard table flatness.

Planting of a bowling green 

Bowling greens are planted using sprigs that are evenly disturbed across the surface. On average 400kg of sprigs is used to cover the 38m x 38m area. Depending on growing conditions and nutrient inputs from planting to first playing, the establishment could vary from around 8 to 14 weeks.

Bowling green mowing

Once covered, the fun of preparation and maintaining the green starts. Most bowling clubs use a Queen mower or the newer models from Aus Turf Machinery (ATM). These mowers are electric and have a 30’’ cut and can cut down as low as a thickness of a 5-cent piece. The important part of bowling green maintenance is the surface. Less thatch and tighter the surface, the faster the ball rolls for the players.

Regular grooming during the growing months removes thatch build-up and encourages new leaves to form on the surface, mowing is completed daily and, in some cases, double-cut or twice a day. The cutting height can vary from the thickness of a 5-cent piece to a 20-cent piece. The secret in turf management is when removing grass or thatch it needs to be replaced with a new leaf. So small amounts of liquid fertiliser regularly are the standard application.

Maintenance

To keep bowling greens in top condition, they are normally renovated annually. This renovation process involves scarifying, aerating, fertilising, and top dressing the green. When this happens on the bowling greens, the bowlers will have a break for a 6-to-8-week period while this spring renovation work is carried out.

Achieving the ‘bowling green look’ at home

The secret to bowling green grass is regular mowing with a cylinder mower, grooming or dethatching, and small regular amounts of fertiliser. Like bowling greens and other sporting surfaces, regular maintenance is key.

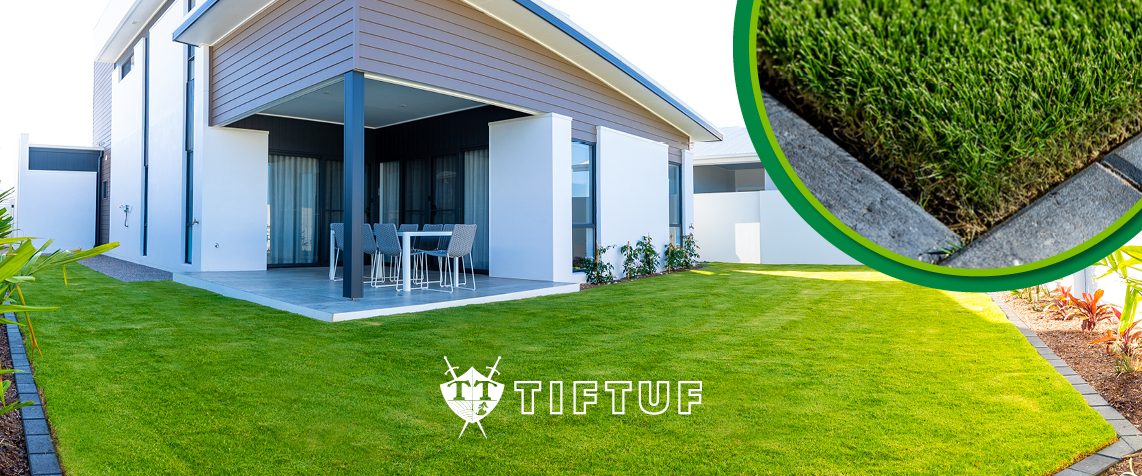
TifTuf Hybrid Bermuda can deliver similar results to Tifdwarf in the backyard when regularly maintained. TifTuf can be mown as low as 10mm, resulting in a similar finish. It has a dense growth and fine leaf blade, ideal for being mown low regularly.

TifTuf Hybrid Bermuda is the latest in turf technology out of the Tifton Campus at the University of Georgia. The Tifton campus is home to the same turf breeding program facility that has developed Tifdwarf and other turf varieties including TifEagle, TifGreen, TifSport, TifWay… the list goes on! The Tifton Campus is continually working to breed the best grasses to be used both domestically and on the sporting field.

Sir Grange Zoysia is another great choice when it comes to low mowing. It too has a dense growth habit but can hold a stunning dark green colour. Sir Grange does have a slower growth rate, but this does reduce the number of times your lawn needs to be mown. Sir Grange can be mown as short as 10mm to unmown, looking great cut at any length!

With regular maintenance and the right turf variety, you too can achieve that perfect bowling green finish for your lawn.


As always, if you have any more questions please don’t hesitate to contact us for free expert advice on 1800ALLTURF (1800255873) or 07 5543 8304.
Good Guys Bad Guys Bug Guide

Some bugs are good, some bugs are great! But how do you know what type of bugs are bad for your lawn? We’ve put together a guide on what bugs you should leave in your lawn and what you should look out for.

Good Guys

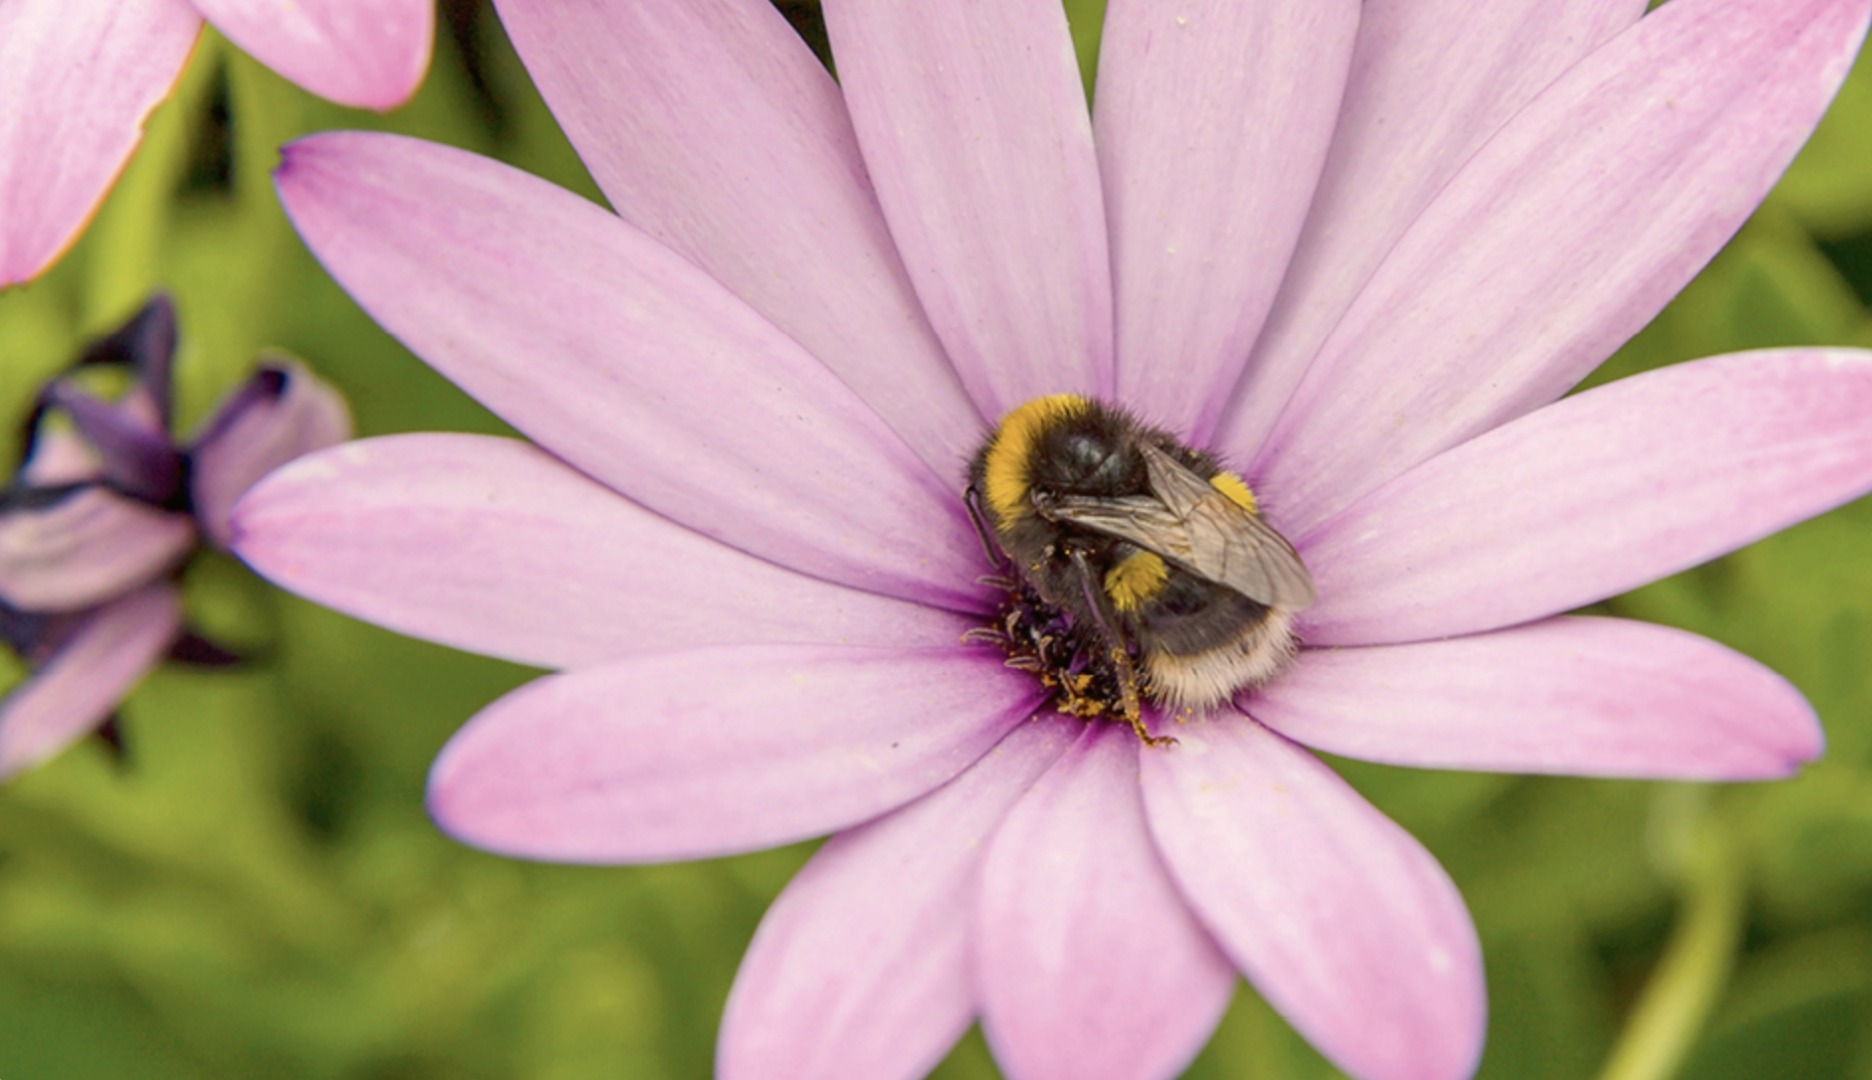
Bees

Bees are one of the most important insects in our environment due to their ability to pollinate our plants. This allows plants to reproduce becoming a food source for many other animals including us!

These guys won’t cause any damage to your lawn, and if you keep out of their way, they should leave you alone too! Fun Fact, bees will sometimes have a nap in a flower when they become tired from gathering pollen!

Lady Beetles

Lady beetles are a beautiful sight to see and are one of the best insects you can encourage in your garden. Lady beetles will help keep the population of aphids at a manageable level so that they won’t cause damage. Lady beetles will also eat a range of other soft-bodied insects like mealy bugs which can cause damage to your lawn. Before the lady beetles turn into their bright red colours they start life out as larvae. The larvae will then turn into the red beetle we know them as.

Earthworms

Earthworms are pleasant little critters that are excellent for the health of your lawn! They will work beneath the turf aerating your soil and breaking down thatch. If you do happen to have these guys in the soil of your lawn, it means that you have a good amount of organic material and nutrients in your soil. When there is an increased amount of moisture within the soil earthworms will rise to the surface and leave a casting. These are also known as mud balls on top of the soil. These castings can affect the appearance of your lawn, especially if there is a heap of them. However, when these castings are dry you can simply rake them across the lawn.

worm castings

Praying Mantis

Praying mantises are one of the more intriguing insects that you may find in your garden. Their front legs are held up, similar to a praying position and their legs are designed specifically for catching prey. These guys target flies, crickets, grasshoppers, spiders, aphids, small frogs, lizards, and mice. Praying Mantis’ are the only insects that can turn their heads to the side at a 180-degree angle!

Bad Guys

Army Worm

Armyworm is a pest that can cause great damage to a lawn within a matter of days. They will tend to move in large numbers across lawns, devastating the plant material they leave behind. They will completely scalp the green leaf growth of the grass and will continue this throughout the whole lawn. Armyworms vary from 2mm to 40mm in length (varying depending on how mature they are). They have 3 prominent white or cream stripes running down the back and side of their bodies. If you do notice that your lawn has armyworm, it is important to act fast to prevent further damage throughout your whole lawn. Treatment options for armyworm include Baythroid Advanced Insect killer for lawns, Grub Guard, Richgrow Grub Killa Hose On and Amgrow Lawn Pest Control.

Lawn Grubs

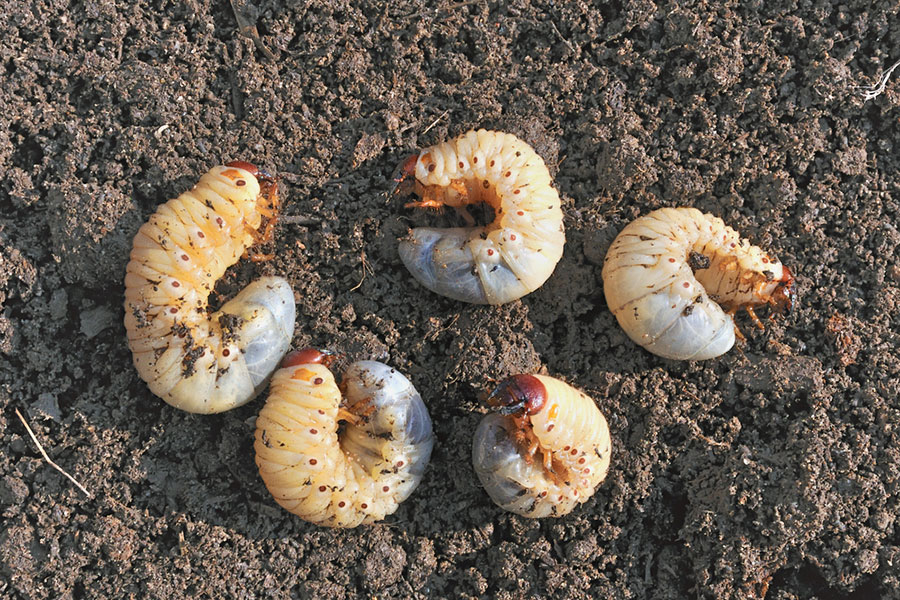
Black beetles on your lawn are a common sight and are a natural part of your garden’s ecosystem. These beetles won’t cause damage to your lawn, but their larvae and grubs in large numbers will. They will cause most of their damage when the temperatures are warmer, from September to march. Their grubs and larvae are treated in similar ways to armyworms. If you see black beetles on your lawn, there is no need to use an insecticide. But if there are larvae on the lawn and there are visible signs of damage it is then best to use an insecticide. We recommend including Baythroid Advanced Insect killer for lawns, Grub Guard, Richgrow Grub Killa Hose On and Amgrow Lawn Pest Control.

Lawn Grubs

Mole Cricket

Mole crickets are common but are rarely seen as they tunnel through the soil, eating at the roots of your lawn. As these insects burrow down in the soil, they can be difficult to treat as an insecticide needs to be washed down into their burrows to make contact with them.

mole cricket

Insecticides

Acelepryn GR is an ideal choice for long term pest control. It provides safe and effective control of damaging causing bugs like armyworms for up to six months while minimising the impact on non-target organisms like bees and earthworms.


As always, if you have any more questions please don’t hesitate to contact us for free expert advice on 1800ALLTURF (1800255873) or 07 5543 8304.
Couch Grass in Focus

Couch Grass

(Cynodon Dactylon)

Couch grass (known as Bermuda grass in the US) is a warm season grass that is native to most areas of the eastern hemisphere. These grasses are commonly known to be highly drought and wear tolerant.

A manicured couch lawn can look great in front of your home, however a bit more time and effort is required due its fast growth rate.

Key Characteristics

Couch grass thrives in full sun areas and has very strong horizontal growth. This allows it to tolerate very low mowing heights. These strong growth habits also attribute to its ability to handle high amounts of traffic, whilst enabling it to recover quicker if affected by wear and stress. This makes couch turf suitable for large areas such as sports fields, golf courses and parks or recreational areas.

These grasses can grow in a range of soil types, from sandy soils to light clays and prefer a pH between 6 and 7.5.

Couches are not one of the most shade tolerant turf types, needing in most cases a bare minimum of 5-6 hours direct sunlight a day. Newer varieties however, like TifTuf Hybrid Bermuda (couch) have shown significantly better shade tolerance than existing couches varieties.

Couch grasses have a great ability to recover from wear, with underground stems called rhizomes to repair from as well as aboveground stems called stolons.

Important points for installation of couch grass

Install the grass as soon as possible after delivery

  • Lay on a bed of 50 to 100mm of quality turf underlay
  • Launcher fertiliser is not recommended during the peak growing season (Sept to March)
  • Roll to compact new turf to improve contact with the soil
  • Soak the newly laid turf thoroughly for 10 to 14 days after installation or until fully established
  • Reduce irrigation once established and water only when the grass appears dry
  • Mow as soon as the grass has rooted in to promote lateral growth. This could be as early as 3 to 5 days after installation during the warmer months.

Couch Grass Maintenance

Irrigation

Couch grasses naturally have a good drought tolerance. TifTuf Hybrid Bermudain particular is an extremely drought tolerant couch variety, requiring considerably less water to maintain acceptable growth and appearance. TifTuf is the only couch grass, or grass of any type for that matter in Australia to have been awarded the Smart Approved WaterMark for its low water requirements.

  • If watering is necessary once established, water only when there are signs of the grass drying out, as excess irrigation can hinder the grass rather than help
  • Do not overwater in the cooler months
  • If irrigation is needed, water deeply to soak the top 100mm of soil
  • Water early morning for improved efficiency and plant health

Mowing

Couch turf’s growth habit allows it to be mown at a range of heights. They can be kept as low as 4mm or let to grow out to 36mm depending on the usage requirements. If a couch lawn is left for long periods without mowing, caution must be taken not to take too much leaf at once.

  • Ensure mower blades are sharp
  • Never remove more than 1/3 of the leaf at any one time unless dethatching
  • Mowing frequency can be reduced with controlled irrigation and fertiliser
  • Couch grasses are best kept between 9mm and 36mm in home lawns; below 25mm is recommended for best appearance
  • If excess scalping occurs, increase mowing height, and allow leaf to regrow to desired level
  • If needed, dethatch in early spring for best results

Fertilising

Couch grasses perform their best when fertilised regularly throughout the year. It is important to consider whole of plant health when applying fertiliser and to avoid the over-stimulation of leaf growth with excessive nitrogen, particularly during the warmer months.

  • Liquid iron, natural colourants and other micronutrients can improve colour without the use of nitrogen-based fertilisers
  • Add nutrients in measured amounts and monitor growth and health of the grass before reapplying

TifTuf was specifically bred to require less inputs than other warm season grasses. TifTuf requires less than 1/3 the amount of fertiliser to maintain healthy growth and appearance.

bunnings turf

Weed and pest control

The rapid coverage and dense undergrowth of couch turf, along with its low input requirements and winter growth activity mean that couch can compete quite successfully with weeds and other turf grass species that may try to invade your lawn.

Couch grass also resists several pests and diseases but may need some assistance from time to time. A couch lawn can be treated with most commonly available chemicals that are suitable for couch grasses. Ensure application directions are followed and if unsure, it is always a good idea to check with your Lawn Solutions Australia supplier for chemical compatibility before use.

Lawn Solutions Australia supplies TifTuf Hybrid Bermuda (couch grass) which is the only grass in Australia to be Smart WaterMark Approved for drought tolerance. This makes it the best choice in couch turf for our harsh Australian climate.

tiftuf hybrid bemuda


As always, if you have any more questions please don’t hesitate to contact us for free expert advice on 1800ALLTURF (1800255873) or 07 5543 8304.

Weed Wands And Weed Pullers

Weed wands and weed pullers are a great way to remove unwanted weeds from your lawn. To help you know when you should use each of these, we have put together a guide on the dos and don’ts of weed pullers and weed wands.

Weed Wands

weed wand

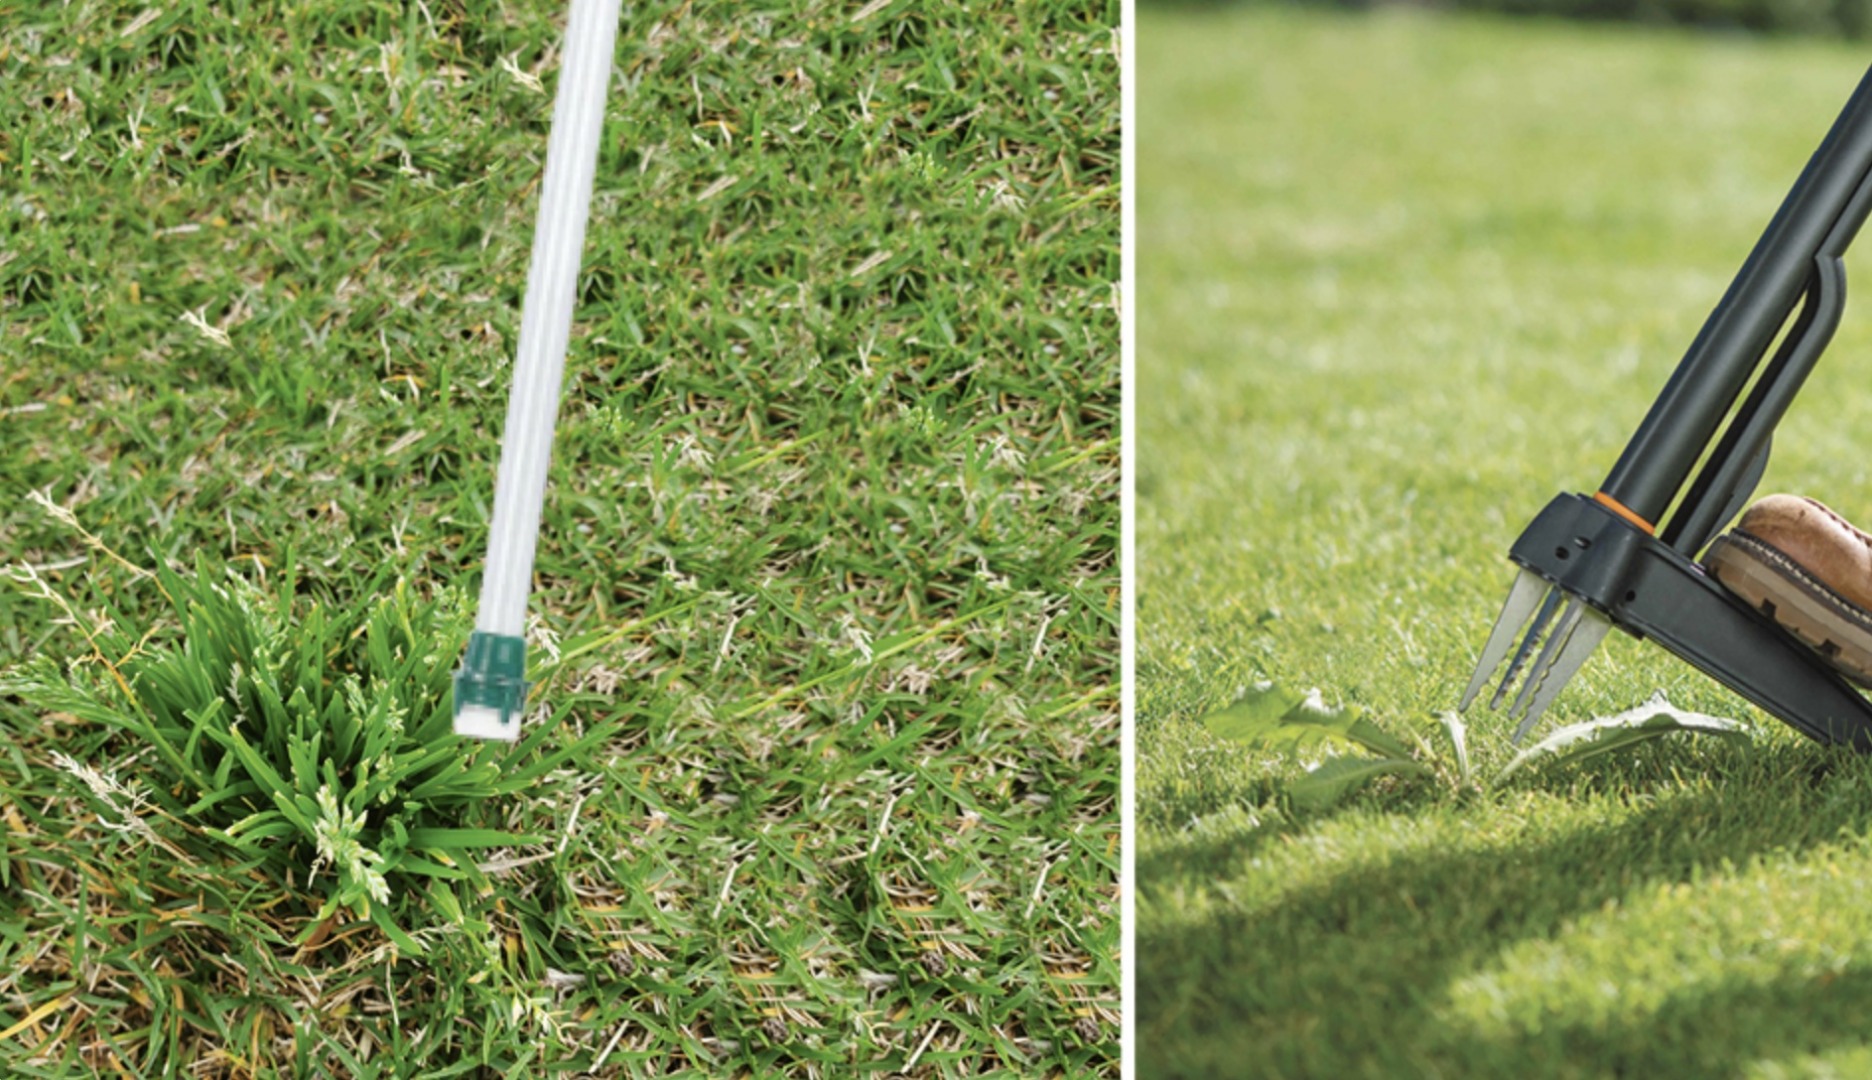
Firstly, let’s look at what weed wands are and when they are best used. Weed wands are a stick that disperses herbicides to a small, selected area of your lawn. These sticks are usually around 1 metre tall, eliminating the need for you to bend or kneel to treat weeds. Weed wands are used to precisely apply herbicides. They are mostly used in situations where there are no herbicides that will selectively treat the weed or grass without harming your lawn, like invasive grasses and hard to remove weeds like onion weed. Non-selective herbicides like roundup are poured into the wand and are dispersed by an applicator on the end of the wand.

The weed wand applicator will usually look like a small paintbrush and will disperse the herbicide to the weed. When using these, it is best to dab the product onto the weed instead of using a sweeping motion to allow for a more accurate application.

Pros

  • Weed wands have a small applicator, allowing for accuracy upon application.
  • Weed wands are best used with a non-selective herbicide that contains glyphosate, like roundup. Non-selective herbicides will kill everything that they touch. This can be handy if you do not know what type of weed you are treating.
  • The weed wand applicator is on the end of the stick so there is no need to bend or kneel.

Cons

  • When using a weed wand, you will need to be careful to only apply the product to the weed you are wanting to treat and not your lawn as it will kill it too.
  • As the weed wand is on the end of a stick, you will have less control of where the applicator will go.

Yates Weed Wand

One of our favourite weed wands is the Yates weed wand. This weed wand comes with a handy screw-on safety cap which is great for when the wand isn’t in use. The wand has a specially designed valve on the brush that prevents any of the product from leaking into your lawn when moving between weeds across your lawn.

Weed Pullers

There is a wide range of weed pullers that are available on the market. Some are small handheld pullers; some have serrated edges making them easier to use in different soil types and some are stand-up pullers stopping you from bending and kneeling. Most will pull the entire plant and root system out. While most weeds can be pulled out, there are some you shouldn’t. Have a look at our blog here for more information on weeds you shouldn’t remove by hand.

weed puller

Pros

  • Weed pullers do not require herbicides. This is particularly handy for those wanting to keep their garden organic.
  • Is one of the easiest and quickest ways to remove weeds from your lawn!
  • The right tool will be able to remove the roots of the entire weeds.
  • Stand-up weed pullers don’t require you to bend over or kneel to remove weeds.
  • You won’t run the risk of accidentally killing your lawn.

Cons

  • Some weed pullers will not be able to remove the entire root system of the weed.
  • Can be time-consuming.
  • Hand-held pullers require you to bend and kneel to remove weeds.

Fiskars Weed Puller

The Fiskars Weed Puller is one of the most popular weed pullers on the market. It is light and easy to use. With this, you don’t need to bend or kneel to remove weeds. The puller has deep-reaching claws that can pull out all the weeds’ roots. This puller is best used in soft soil, where there is little compaction and clay.


As always, if you have any more questions please don’t hesitate to contact us for free expert advice on 1800ALLTURF (1800255873) or 07 5543 8304.

Zoysia Grass In Focus

Zoysia Grass

Pronunciation

Zoi see uh

Zoysia grass are warm season grasses that are native to South East Asia and the Pacific region. These grasses are commonly known to be highly drought and wear tolerant.

Zoysia is a turfgrass type that has several different sub-genus, all of which carry very different characteristics and aesthetics to the next. While they still do carry the name botanically in a lot of marketing material, it is important to understand the difference when looking at the different options available.

Key Characteristics

Most Zoysia grass types are well-adapted to tropical, sub-tropical and warm temperate climates in Australia.

  • Establish slower than most other grass types.
  • Zoysia Grass has a relatively fine leaf up to 5mm wide and 40-50mm long which is soft to touch.
  • Zoysia grasses spread both by stolons and by rhizomes and are noted for their relatively slow growth rate which reduces the frequency that mowing is needed.

What are the main zoysia turf types?

Zoysia Macrantha

Zoysia Macrantha’s are the only zoysia that is considered Australian natives and are commonly referred to the as prickly couch. Some examples of Macrantha which are available on the Australian market are Nara Native Zoysia and Stockade Native. Macrantha generally performs better in the warmer climates of Australia and in full sun areas. Macrantha’s leaf shape and colour varies depending on the variety but are medium to coarse and light green in colour. The wear tolerance and shade tolerance of Zoysia Macrantha’s are inferior to the other types of zoysia.

Zoysia Japonica

Zoysia Japonica originates and is native to the coastal grasslands of South East Asia. Japonica’s have been introduced and used as a popular choice for home lawns and public areas around the world. The common types of Zoysia Japonica which are available around Australia are Empire Zoysia and Platinum Zoysia. Japonica’s have a medium leaf texture, fair shade and wear tolerance and again are more suited to the warmer climates of Australia. Zoysia Japonica’s will struggle through the colder months in southern areas of Australia.

Zoysia Matrella

Like Japonica’s, Zoysia Matrella’s are native to South East Asia. Unlike their Japonica counterparts, Matrella’s have a very fine leaf and have high shade tolerance. Until just recently, Matrella’s were primarily used in golf, but now their qualities have proven they are perfect for home lawns and commercial applications. They require less mowing, less fertiliser, less water and have a higher density than the other zoysia’s. Matrella’s that are on the Australian market include Sir Grange (Zeon Zoysia) and Shadetuff. Zoysia Matrella can be successfully installed all around Australia and make for a fantastic lawn both domestically and commercially.

Important points for installation of zoysia grass

  • Install the grass as soon as possible after delivery
  • Lay on a bed of at least 150mm quality sandy loam (high sand content is essential) or washed sand
  • Use Lawn Solutions Australia Lawn Launcher at label rates to give the grass
  • a head start and retain moisture in the new soil bed
  • Roll to compact new turf to improve contact with the soil
  • For the first 14 days, irrigate the new lawn for at least 40 mins every day
  • After the initial 14 days post-installation, you can reduce irrigation to every second day for the next 14 days
  • Reduce irrigation once established and water only when the grass appears dry
  • Minimise irrigation in the cooler months to avoid your lawn getting waterlogged
  • Consult your local supplier for seasonal advice on installation timing in cooler regions

Maintenance of Zoysia Grass

Irrigation

If watering is necessary once established, water only when there are signs of the grass drying out, e.g. wilted leaves

  • Do not overwater in the cooler winter months
  • If irrigation is needed, deeply soak the top 100mm of soil
  • Water early morning for improved efficiency and plant health

Mowing

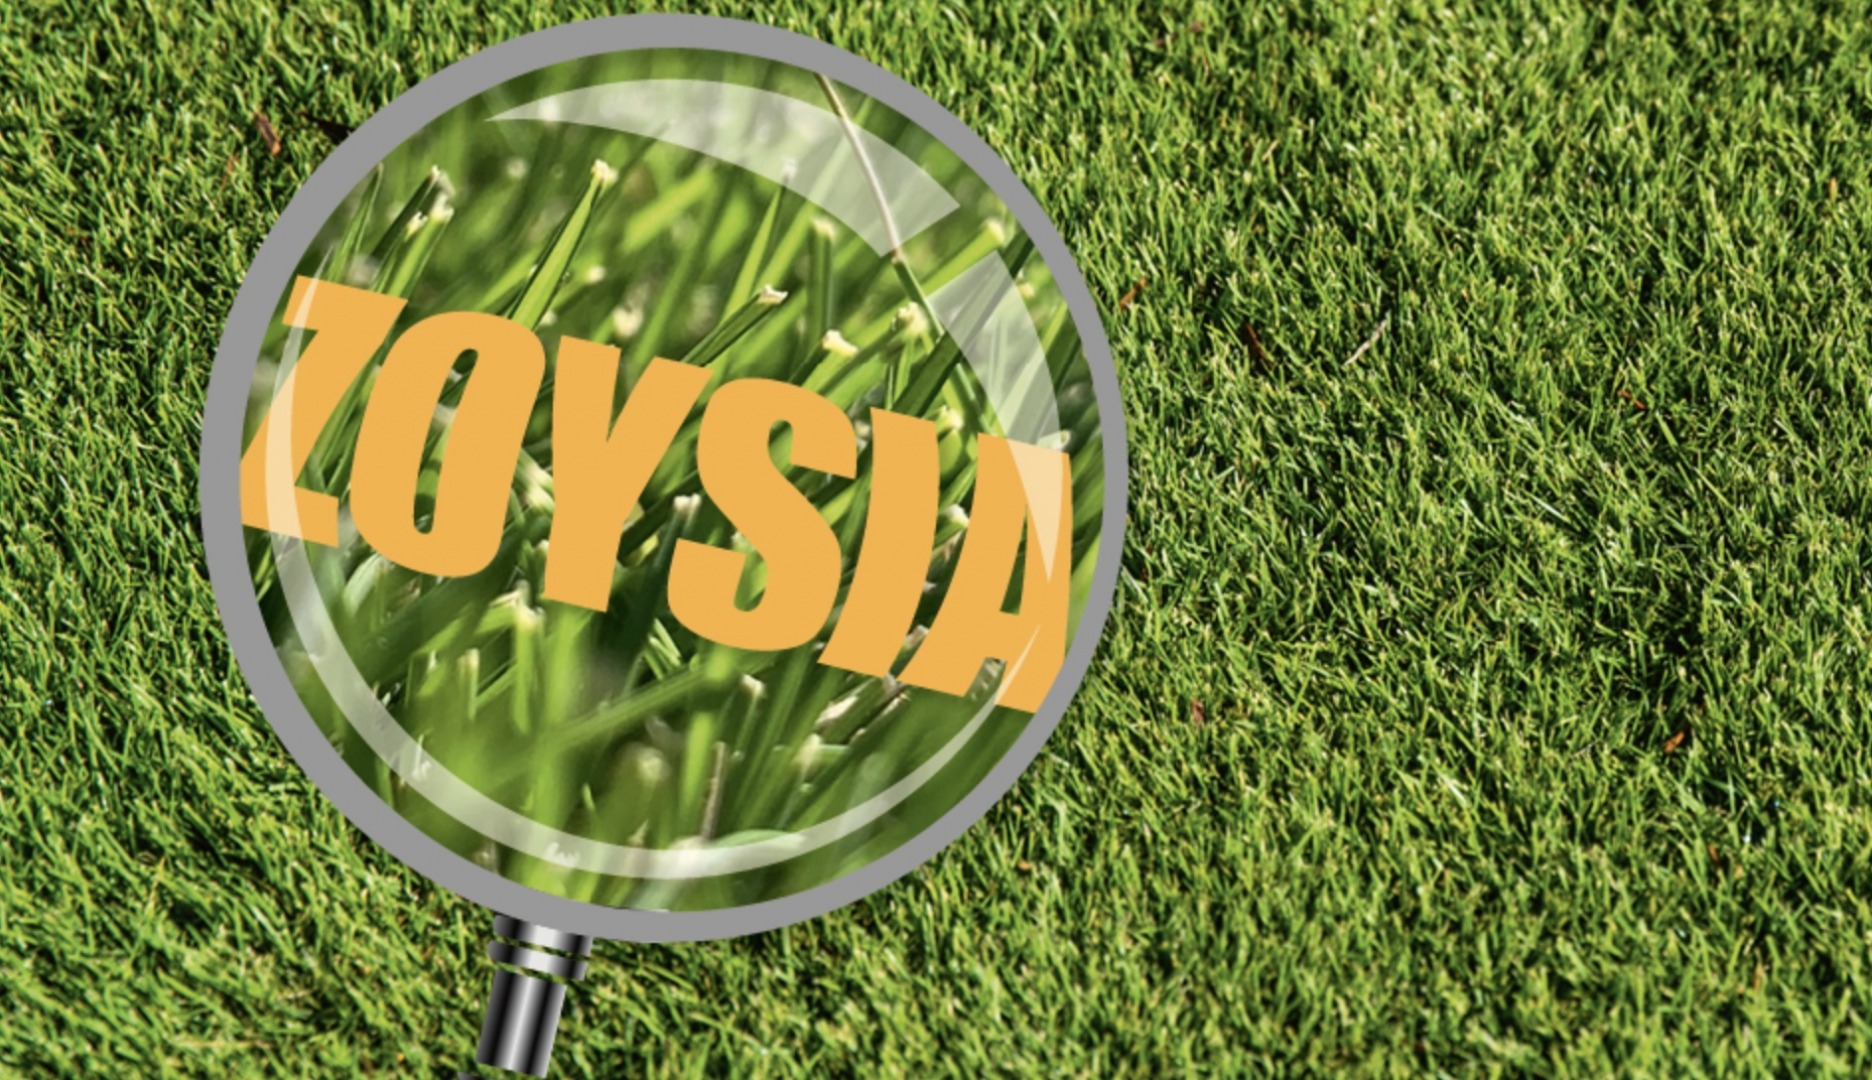
Zoysia grasses, Zoysia Matrella in particular, have a leaf blade that has a high silicone content, which makes it very strong. This, along with its dense vertical growth, gives grasses like Sir Grange superior surface strength and appearance.

  • Ensure that mower blades are sharp to prevent tearing of the leaf
  • Never remove more than 1/3 of the leaf blade at any one time unless dethatching
  • For best results, dethatch in late winter just before the grass comes out of dormancy
  • Remove clippings each mow to prevent thatch build-up

Fertilising

  • Fertilise between early spring and mid to late summer if required
  • It is not recommended to fertilise in autumn, wait until spring to reapply if needed
  • Liquid iron, natural colourants and micronutrients can be used to improve colour without the use of nitrogen-based fertilisers in autumn and winter

Weed and pest control

Most commercially available chemical weed and pest control products can be used on zoysia lawns, but it is always best to read the label and check with your Lawn Solutions Australia grower for recommended products before any application.

Lawn Solutions Australia supplies Sir Grange Zoysia which has been selectively bred for its superior drought and shade tolerance, as well as reduced need for additional nutrients. Sir Grange has been hand-selected from over 10,000 different varieties of turf, with its superior qualities making it stand out from the crowd.

Sir Grange was originally developed for the golf industry, but it was soon discovered that due to its characteristics, it would make a fantastic home lawn. Its adaptability to a variety of climates in combination with the beautiful dark green leaf has seen it become the top-selling zoysia grass in the USA.

Sir Grange Logo


As always, if you have any more questions please don’t hesitate to contact us for free expert advice on 1800ALLTURF (1800255873) or 07 5543 8304.

How To Conquer Clover

Clover (Trifolium)

  • Clover is not that much of an undesirable weed and can be easily managed in most cases.
  • In some parts of the country, clover is intentionally added to lawns to assist with drought.
  • Keeping your lawn’s nutrient and nitrogen levels at the right rate will reduce clover infiltration.

Clover may be a lucky charm, but you may not be so lucky to have it infest your lawn. It is a common lawn-weed and as far as weeds go on the ease-of-eradication-scale; clover is simple to control in most cases.

How To Identify Clover

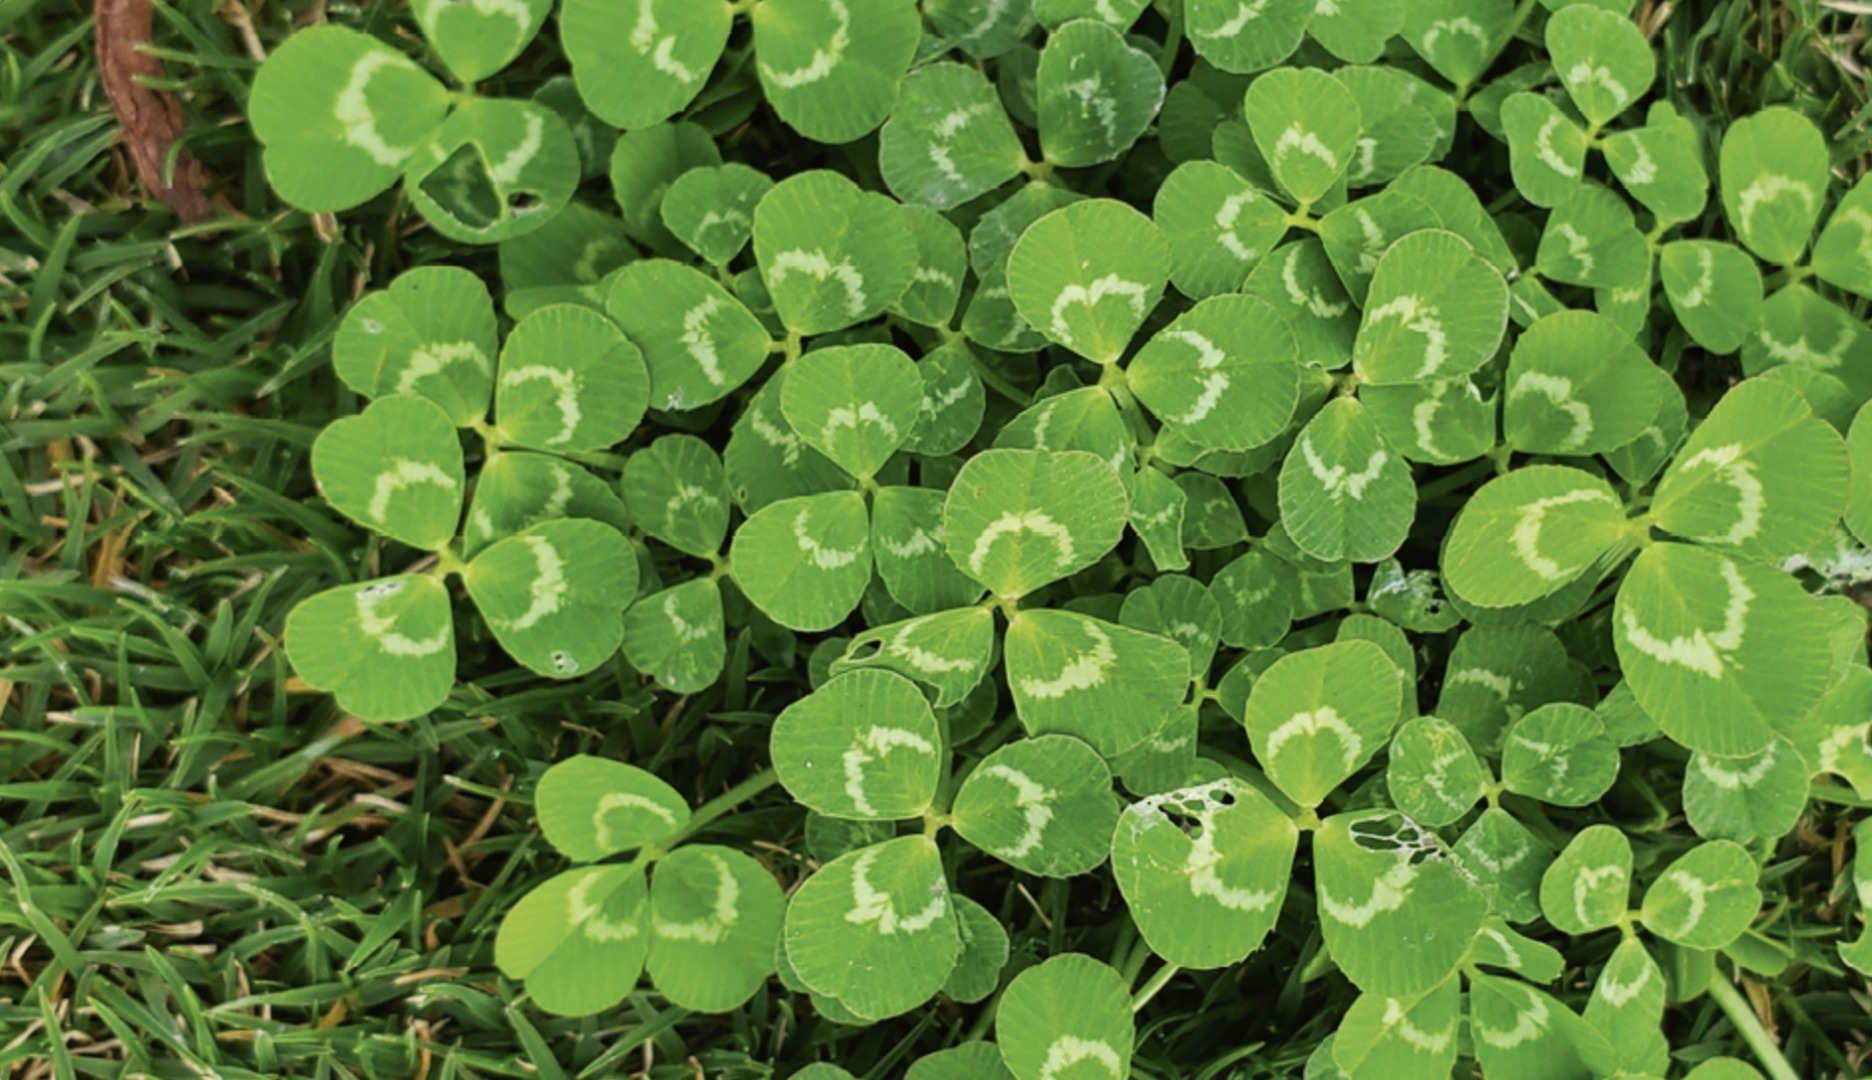
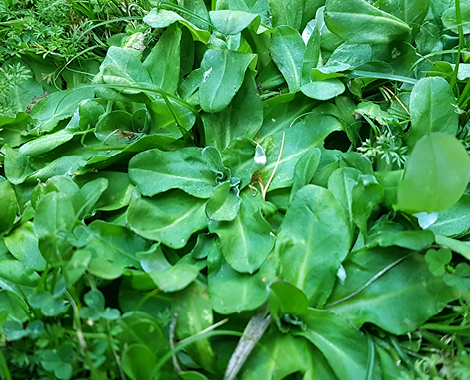
Clover can be easily identified in your lawn by its oval-shaped leaves. It will commonly grow in 3 leaflets (four if you’re lucky!) with a white circular marking across all of the leaves. Clover will have a creeping stem that touches the ground and will produce either a white or pink flower depending on the species.

clover

Treatment

There are a number of broadleaf weed and clover specific selective weed sprays like Amgrow Bin Die and All Purpose Weed Control that will do the job relatively quickly. Amgrow Bin Die comes in a concentrated form and will need to be mixed up with water in a knapsack or pressure sprayer. All-Purpose Weed Control has an easy-to-use clip-on hose attachment.

weed control

Nitrogen 

In some cases, a higher nitrogen fertiliser program will more than likely prove just as effective.

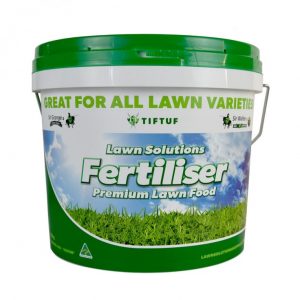
Clover is one of those legume plants, like beans and lucerne or alfalfa. It will draw nitrogen from the air and stores it in its roots. As the roots die back, the nitrogen is replenished into the soil but where there is sufficient nitrogen in your soil to keep your lawn healthy, the clover struggles to survive. In most cases when you see clover growing in your lawn it means that there isn’t enough nitrogen. Lawns love nitrogen, while clover hates it, so increasing the fertiliser on your lawn is a must if you want to send a clear message of clearing your lawn. Use what they call a high NPK fertiliser, one that has high levels of nitrogen, phosphorous, and potassium – something like Lawn Solutions Premium Fertiliser.

lawn fertiliser

Read the label for the best advice for the rate you should apply and be sure to water in well. Following one or more applications your lawn should look in great condition with less clover content. Keeping your lawn’s nitrogen levels in check by fertilising it will prevent clover from coming back. Some people chose to live with a smattering of clover on their lawn. Depending on your grass type, the two may co-exist without being too much of an eyesore. Mowing the clover back will help keep it under control to some degree but won’t prevent it from coming back. Clover has no issues with being mowed nice and short, but your grass doesn’t love it. Cutting your lawn short will be appreciated by the clover but will stress out your grass.

So, mowing high will give your lawn a leg-up on the clover. ‘Good luck’ with these tips on getting rid of your clover, if that’s what you choose to do! Lawn care doesn’t need to be difficult and simple hints from Lawn Solutions Australia and their network of member turf growers and Lawn Solutions Centres Australia-wide can help with products to keep your lawn in top condition this summer.


As always, if you have any more questions please don’t hesitate to contact us for free expert advice on 1800ALLTURF (1800255873) or 07 5543 8304.

Buffalo Grass In Focus

Buffalo Grass

(Stenotaphrum secundatum)

Buffalo grass (known as St. Augustine in the US) is a warm-season grass that is native to areas of North and South America, parts of Africa and the Caribbean. Commonly known as soft leaf buffalo in Australia.

Buffalo grasses are a great all-round turf variety with a number of key strengths that make them an ideal variety for many Australian backyards.

Buffalo grasses have been developed over the years from the scratchy older types to the soft leaf buffalo’s that are commonly supplied today, like Australia’s most popular variety Sir Walter DNA Certified.

Sir Walter Buffalo DNA Certified turf

Key Characteristics of Buffalo Grass

These grasses can grow in a range of soil types, from sandy soils to light clays and at a range of pH levels between 5 and 8.5.

Buffalo turfs are one of the most shade tolerant turf types, with the ability to survive in areas receiving as little 40% sunlight, or 3-4 hours direct sunlight a day.

They also have a good tolerance of salinity and make for a great option in coastal areas.

Buffalo grasses only have above-ground stems known as stolons to establish from. Their stolons are very robust and hardy providing these grasses with a good wear tolerance. They will however be a little bit slower to repair than varieties like kikuyu or couch that also have underground stems called rhizomes to repair from as well as stolons.

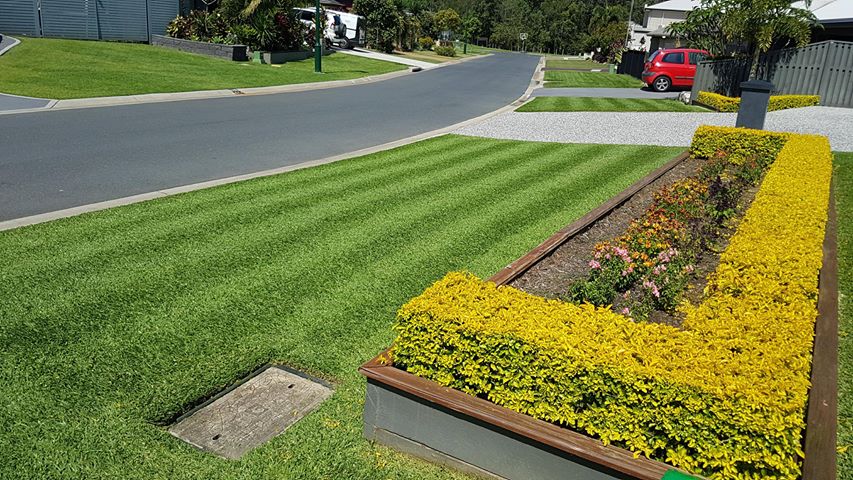
lawn stripes

How Buffalo Grass is Grown

Buffalo grasses are grown on turf farms through the establishment of vegetative material. When buffalo turf is harvested, strips known as ribbons are left behind in order for the turf paddock to re-establish again for harvesting. Buffalo turf cannot be established through seed as the seed heads that are produced are sterile and seed production is minimal. When looking to repair or patch a buffalo lawn, it will need to be established through vegetative material, so spreading of the runners, or by installing some more solid turf.

Buffalo turf can be installed year-round Australia wide. It establishes quickly over the warmer months but can take a little longer if you are installing in winter.

Important points for installation of buffalo grass

  • Install the grass as soon as possible after delivery
  • Lay on a bed of 100mm of quality turf underlay
  • Use Lawn Solutions Australia Lawn Launcher at label rates to give the grass a head start and retain moisture in the new soil bed
  • Roll to compact new turf to improve contact with the soil
  • Soak the newly laid turf thoroughly for 10-14 days after installation or until established
  • Reduce irrigation once established and water only when the grass appears to be dry
  • Minimise irrigation in the cooler months to avoid your lawn getting waterlogged
  • Consult your local supplier for seasonal advice on installation timing in cooler regions

laying lawn

Maintaining Buffalo Grass

Irrigation

it is important to be mindful of correct and efficient irrigation practices to maintain a healthy buffalo lawn.

  • If watering is necessary once established, water only when there are signs of the grass drying out, e.g. wilted or curled leaves
  • Do not water in the cooler winter months unless there are signs of the above
  • If irrigation is needed, deeply soak the top 100mm of soil (generally 30 minutes with a standard sprinkler will suffice)
  • Water early morning for improved efficiency and plant health

Mowing

Buffalo grass can be mowed between 20 and 60mm. They are best mowed with a rotary mower, but a cylinder mower can also produce fantastic results. Removing clippings is encouraged; however, mulch mowing is fine as long as clippings are not thick enough to inhibit the lawn from getting sunlight. Over winter it is recommended to leave your lawn slightly longer.

  • Ensure that mower blades are sharp to prevent tearing of the leaf
  • Never remove more than 1/3 of the leaf blade at any one time unless dethatching
  • Dethatch if required in late spring for best results
  • It is recommended to remove clippings each mow to prevent thatch build-up

Fertilising Buffalo Grass

If you want your buffalo grass to remain healthy and have a nice, deep green colour, it is best to fertilise a few times per year.

  • Apply slow-release granular fertiliser at a rate of 20-25g/m2 or 2-2.5kg/100m2
  • For best results, fertilise at least 3 times per year. Important dates are late spring, mid to late summer and late autumn
  • Always irrigate after applying fertiliser
  • On new lawns, apply fertiliser after you have cut your lawn at least once
  • To best maintain year-round colour, fertilise in late autumn and apply ColourGuard PLUS at 10 to 12-week intervals until spring

Lawn Solutions Fertiliser

Weed and Pest Control for Buffalo Grass

Many buffalo types of grass like Sir Walter DNA Certified have fantastic natural resistance to most pests and weeds. To keep weeds at bay, it is important to fertilise your lawn regularly to keep it healthy. This will ensure it is sufficiently dense to block weeds out, and high nitrogen levels will also keep most weeds away.

To ensure your lawn remains pest free, always keep an eye out for signs of infestation and be proactive with preventative pesticides, such as Acelepryn GR.

Most domestically available chemical weed and pest control products can be used on buffalo lawns (with the exception of some Weed ‘n’ Feeds), but it is always best to read the label and check with your Lawn Solutions Australia grower for recommended products before any application.

Some common broadleaf herbicides contain Dicamba which is not safe to use on buffalo lawns. All-Purpose Weed Control and Bin Die Herbicide contain the active Bromoxynil which is safe to use on buffalo grass.

If you think buffalo grass is the right choice for your lawn, you cannot go past Sir Walter DNA Certified. Bred right here in Australia, Sir Walter DNA Certified has been the number one choice for Aussie backyards for over 20 years. Look out for the ‘Original Breeder Guarantee’ to ensure you are getting the genuine Sir Walter DNA Certified.

SirWalter-DNA_Original-Breeders


As always, if you have any more questions please don’t hesitate to contact us for free expert advice on 1800ALLTURF (1800255873) or 07 5543 8304.
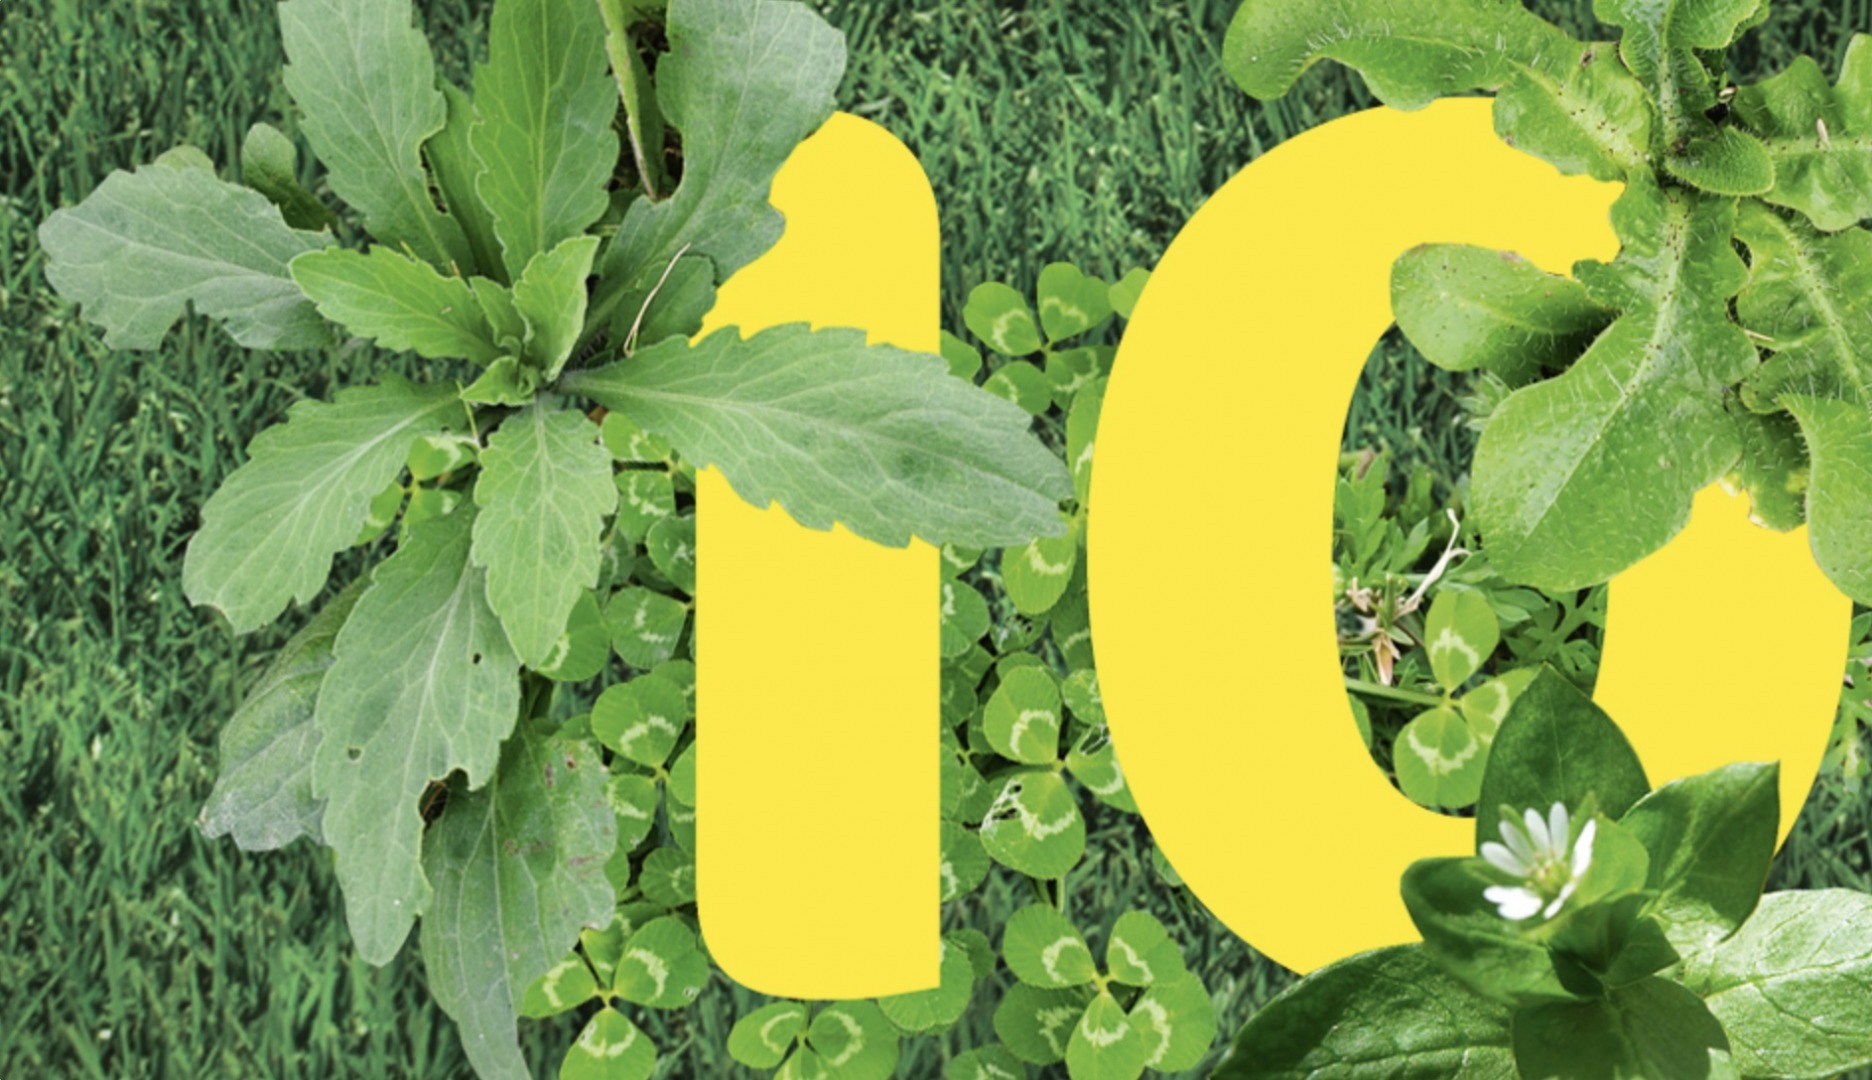
10 Common Lawn Weeds | Can You Guess Them All?

Can you identify all these common lawn weeds? We take a look at a few common lawn weeds that might be growing in your grass and what you can do to remove them.

Clover

Clover

Clover can easily be identified by its oval-shaped leaves. It will commonly grow with 3 leaves (four if you are lucky) with a white circular marking across all the leaves. The leaf will grow from a thin stem with white ball-like flowers.

Clover can easily be treated with a common broadleaf herbicide or a specific clover specific weed spray. To remove clover, we recommend using either Amgrow Bin Die or All Purpose Weed Control with the active ingredient Bromoxynil or removing by hand.

You can find more information on Clover here.


Lawn Weeds Bindii

Bindii

Bindii is a low growing weed with a flower at its centre. At maturity, the flower will produce a prickly seed pod, which can be quite annoying in the warmer months when enjoying your lawn.

Bindii can easily be removed by hand, or with a broadleaf herbicide with the active Bromoxynil like Amgrow Bin Die or All Purpose Weed Control. It is best to remove Bindii before it goes to seed to avoid stepping in those painful prickles.

You can find more information on Bindii here.


Paspalum

Paspalum is a perennial grass weed that is mostly found in the South-eastern states of Australia. It will have a purple tinge as the base of its broad leaves and will primarily grow throughout the warmer months. This weed will spread through the transport of its sticky seeds, easily sticking onto pets and shoes.

With Paspalum the easiest way to remove it is to remove it by hand. When doing this, make sure you dig underneath the crown, below the soil level and remove the entire plant. There are also selective herbicides that are available. Paspalum, Nutgrass & Clover Weed Killer with the active ingredient DSMA can easily be mixed in a knapsack or pressure sprayer, repeated applications may be needed. For kikuyu, buffalo and blue couch lawns please note this herbicide can harm your lawn too, so it is only best to spot treat these weeds.

You can find more information on Paspalum here.


oxalis

Oxalis

Oxalis has a similar appearance to clover. One of the main differences is oxalis has small light green or purple heart-shaped leaves, while clover will have oval-shaped leaves. There are a few different variations in their flower colour including white, pink, and yellow. There are a few species of oxalis, the common species found here in Australia is creeping oxalis.

To remove creeping Oxalis, a selective herbicide with Bromoxynil as the active ingredient like Amgrow Bin Die or All Purpose Weed Control can be used.

You can find more information on Oxalis here.


cudweed

Cudweed

Cudweed is another common weed that you may have noticed growing in your garden. It is an annual winter weed those forms in rosettes. It has glossy light green leaves on top and has a white and furry side underneath. They have various small flowers that grow from their stems.

It’s best to remove them by hand or with a selective herbicide with Bromoxynil as the actives such as Amgrow Bin Die or All Purpose Weed Control. You may require two or more applications. The glossiness of the leaves helps in its resistance to herbicides and makes it very difficult to control. You can add a few drops of dishwashing liquid or another surfactant to the herbicide mix, this will help it to stick to the leaves.

You can find more information on Cudweed here.


chickweed

Chickweed

Chickweed is a low growing, winter annual weed that can continue growing all through summer. It has paired leaves protruding opposite one another that have minimal fine hairs. As temperatures rise white flowers bloom in clusters at the end of a stem.

Like most lawn weeds, the easiest method of removing Chickweed from your lawn is by hand. Dig underneath the weed and remove the full plant from the grass. But, if there is a substantial amount present a herbicide with Bromoxynil as the active like Amgrow Bin Die or All Purpose Weed Control is the way to go.

You can find more information on Chickweed here.


nut grass

Nutgrass

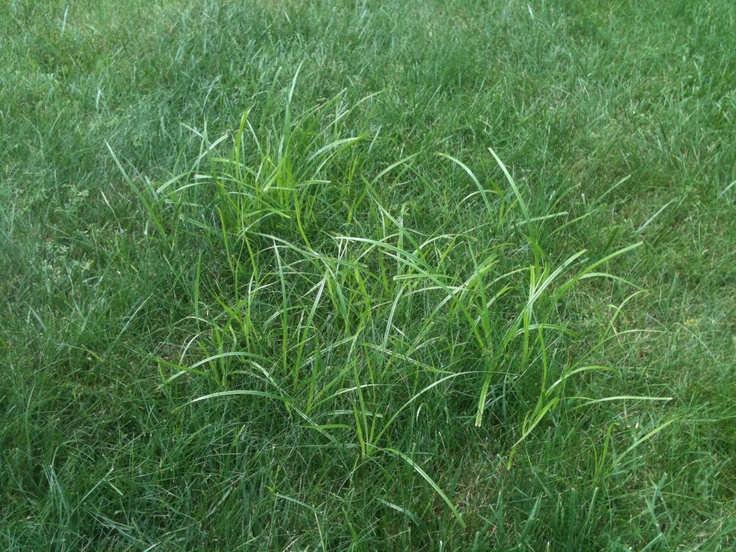
Nutgrass is identifiable as it is usually a lighter green than the rest of your lawn and tends to grow taller. It has 3 blades that shoot up from the stem and has a triangular stem rather than a circular stem like most grasses.

If you do notice this weed in your lawn it is best to act quickly before it spreads. You can remove Nutgrass by digging it out with a small spade. You must be extremely diligent with this to ensure there are no roots or bulbs left in the soil as Nutgrass will reappear if left behind. If there is a large amount of Nutgrass in your lawn, you will need to treat it with a selective herbicide with the active ingredient Halosulfuron-Methyl such as Amgrow Sedgehammer.

You can find more information on Nutgrass here.


summer grass

Summer Grass

Summer grass is a common annual weed that has soft hairy leaves that grow close to the ground in clusters. The grassroots at the node (joint) and the sheathes of the leaf are usually purple-tinged in colour at the base.

Best to remove Summer grass by hand. If your lawn is unhealthy it will continue to reappear. By thickening up your lawn and keeping it healthy you will make it difficult for the summer grass to return. Herbicides with DSMA as the active ingredient like Paspalum, Nutgrass and Clover Weed Killer, commonly used for paspalum, will remove Summer grass. However, herbicides with DSMA are not safe for Kikuyu and buffalo lawns, so it is best to only spot treat.

You can find more information on Summer Grass here.


crowsfoot

Crowsfoot (commonly known as Crabgrass)

Crowsfoot is a summer annual grass that grows in easy to identify tufts. This weed grows flat to the ground with almost white flat sheathed stems and smooth strap-like leaves.

The best way to remove crowsfoot is to chip out by hand. Make sure when doing so that you carefully remove the entire plant and don’t spread any seeds during the process. Paspalum, Nutgrass & Clover Weed Killer, and herbicides formulated with the active DSMA will control crowsfoot. Again, when using products with DSMA as the active ingredient on Buffalo and Kikuyu it is best to only spot treat the weed as these herbicides can harm your lawn as well.

You can find more information on Crowsfoot here.


mullumbimby couch

Mullumbimby Couch

Mullumbimby Couch is a perennial mat-forming, grass-like sedge with dark green, glossy, strap-like leaves. It possesses tough and long rhyzomes which are red to purple in colour.

If you do notice this weed growing, it is best to act quickly before it spreads and becomes very difficult to remove. You can dig them out with a small spade. But you have to be extremely diligent with this to ensure there are no roots or bulbs left in the soil as they will reappear if left behind. If there is a large amount of Mullumbimby Couch in your lawn, you will need to treat it with a selective herbicide with the active ingredient Halosulfuron-Methyl such as Amgrow Sedgehammer.


As always, if you have any more questions please don’t hesitate to contact us for free expert advice on 1800ALLTURF (1800255873) or 07 5543 8304.

What Are Controlled Release Fertilisers?

Fertiliser Technologies You Need To Know

Dr Sam Stacey and Will Pearce, ICL Specialty Fertilisers

Healthy, resilient turf needs adequate nutrition and that’s why applying the right fertiliser product is so important. With so many fertiliser technologies on offer it can be difficult to know which product will give the best result. This article has been written to help demystify the differences between conventional, slow-release and controlled release fertilisers. We look at how each technology affects nutrient delivery to turf, how long they feed turf for and how local environmental conditions affect performance.

Conventional fertilisers – how long do they last?

Studies show that almost all of the nitrogen and phosphorus in conventional fertiliser granules is released on the same day that it is applied to the soil (this occurs whether a granule ‘shell’ is still visible or not). Fast dissolution is very easy to observe with urea granules, which can dissolve in minutes following light irrigation or even on humid days. Liquid or foliar fertilisers behave like conventional fertilisers in that they provide immediately soluble nutrients. All of these fertilisers provide an almost immediate response but have a short-term effect.

Once nutrients are released from the granule, they are subject to the prevailing environmental conditions. Either they will be taken up by the turf or remain in the soil where they are potentially subject to leaching (washing through the soil below the root zone) or, in the case of nitrogen, gaseous loss to the atmosphere (e.g. volatilisation or denitrification). Wet conditions from rainfall or frequent irrigation can increase nutrient losses. Fertiliser that has been leached or lost is no longer available to the turf.

There are three broad categories of technologies that have been designed to reduce losses of nutrients (mainly nitrogen) and keep more of the fertiliser in the root zone where it is available to the turf. The technologies are 1) Slow Release, 2) Controlled-Release and 3) Inhibitors(nitrification or urease).  We discuss how both Slow Release and Controlled Release technology affects fertiliser behaviour and availability to turf below.

controlled release fertiliser trial

ICL and Lawns Solutions Australia are currently running a trial at Daleys Turf on a range of granular fertiliser technologies and their effect on the establishment of Sir Grange Zoysia turf.

Slow and Controlled Release Fertilisers

Slow and controlled release fertilisers work by slowing the delivery of nutrients in the soil. Unlike straight urea or compound granules, controlled-release fertilisers release small amounts of nutrient each day for up to months at a time (the exact period is product dependent). Slowing and controlling the release of nutrients has the following benefits:

  • One application of fertiliser can potentially feed the turf for months, so far fewer applications need to be made, which can reduce labour costs;
  • The potential for burning of turf is significantly reduced because the nutrients are not immediately soluble.
  • The turf receives consistent nutrition because the fertiliser releases a small amount each day. This leads to more even growth, better density and consistent colour.
  • Nutrients are far less likely to be lost by leaching because only a small amount of nutrient is released into the soil at any one time. Polymer coating around the fertiliser granules protects the nutrients inside.
  • A sudden bout of heavy rainfall will not empty the soil of nutrients like it can when conventional or even inhibitor-treated fertilisers have been used. Polymer-coated fertilisers will continue to slowly release nutrients, which will replenish the soil once the rainfall has stopped.

The difference between Slow Release and Controlled Release fertilisers

We find that some manufacturers use different terminology, but the internationally accepted definitions are that the term slow release is usually used to describe a fertiliser that is not polymer-coated and works by being partially insoluble. The fertiliser takes longer than usual to dissolve in the soil and therefore delivers nutrients over a longer period. For e.g. Lawn Solutions Premium Fertiliser.

lawn solutions fertiliser

What are Controlled Release Fertilisers?

Controlled release is used to describe fertilisers that have an outer polymer, polymer-sulphur or resin coating. The coating acts like a rain jacket; it slows moisture absorption by the granule and then slows the release of nutrients into the soil. With a good quality coating, it is possible to pre-program the fertiliser to release nutrients daily over different periods. Some controlled release fertilisers deliver nutrients over 2 months, others 6 months and others 8 months.  Some examples include ICL Maintenance and All Round Fertilisers.

ICL fertiliser ICL controlled release fertiliser

ICL manufactures some for ornamental plant production that release slowly and consistently over an 18-month period!

controlled release fertiliser

Figure 1. Controlled release fertilisers have a resin or polymer coating that slows and controls nutrient release into the soil.

These are the features of slow-release and controlled-release fertilisers that matter in turf management:

Slow-release

  • Often deliver nutrients, especially nitrogen, over a shorter time-period compared to controlled-release (e.g. approximately 8 weeks in the case of methylene-urea).
  • Can be manufactured with very small particle sizes, which is ideal for fine turf such as golf greens and tees, bowling greens and grass tennis courts.
  • Are less likely to burn or damage turf (compared to conventional or inhibitor-treated fertilisers).
  • Often only nitrogen release is slowed.
  • ICL has recently released new slow-release phosphorus and calcium fertiliser called “Pearl” in the Sierrablen Plus range, especially targeted at improving root development in turf renovations.

Controlled release

  • Delivers nutrients over a longer time-period. Turf fertilisers most commonly use either 3-month or up to 5-months longevity.
  • Have larger granule sizes than slow-release but are still available as a mini granule of 1.5 mm. Ideal for sports fields, fairways, amenity turf. Not ideal for very fine turf such as golf greens.
  • Offer the most controlled and predictable release of nutrients of any fertiliser. Are not affected by most environmental conditions such as the amount of rainfall or soil pH.
  • Nutrient release is faster in warmer temperatures, which can match the increase in turf growth rate and demand for nutrients.
  • Virtually any nutrient can be coated, so it is possible to supply turf with controlled-release nitrogen, phosphorus, potassium, sulphur and trace elements.

Some blended fertilisers are labelled as containing controlled release. However, many have only a small percentage of the nitrogen or potassium coated (e.g. 10% or less) with the rest behaving like ordinary agricultural fertiliser. To get the full benefits of controlled release it is important to use products with high coating rates (minimum 25% coated N for fairways and sports fields, higher levels for higher-end turf).

Which product will be the most effective?

If you want to apply fertiliser infrequently yet still have nutrients continuously available to the turf (to maintain density and colour over the long-term) then a controlled or slow-release fertiliser will provide the best performance. Controlled release is usually recommended for sports fields, fairways and parks/gardens and a slow-release with small particle sizes for fine turf.

Conventional fertilisers are still used in turf management. They release quickly and their effect is short-term, especially for turf grown on a sand-based construction. Despite the higher cost per bag, a good quality controlled or slow-release fertiliser is likely to give better overall performance (by continuously feeding the turf), be more efficient at lower application rates and give better environment outcomes.

References:

Dougherty WJ, Collins D, Van Zwieten L, Rowlings DW (2016) Soil Research, 54(5) 675-683.

Gioacchini P, Nastri A, Marzadori C, Giovannini C, Antisari LV, Gessa C (2002) Biology and Fertility of Soils, 36(2) 129-135.

Guertal EA, Howe JA (2012) Agronomy Journal 104(2) 344-352.

Irigoyen I, Muro J, Azpilikueta M, Aparicio-Tejo P, Lamsfus C (2003) Australian Journal of Soil Research 41, 1177-1183.

Mosdell DK, Daniel WH, Freeborg RP (1986) Agronomy Journal 78(5) 801-806.

Waddington DV, Landschoot PJ, Hummel Jr NW (1989) Communications in Soil Science and Plant Analysis 20(19-20), 2149-2170.


As always, if you have any more questions please don’t hesitate to contact us for free expert advice on 1800ALLTURF (1800255873) or 07 5543 8304.

Is Urine Burn Ruining Your Lawn?

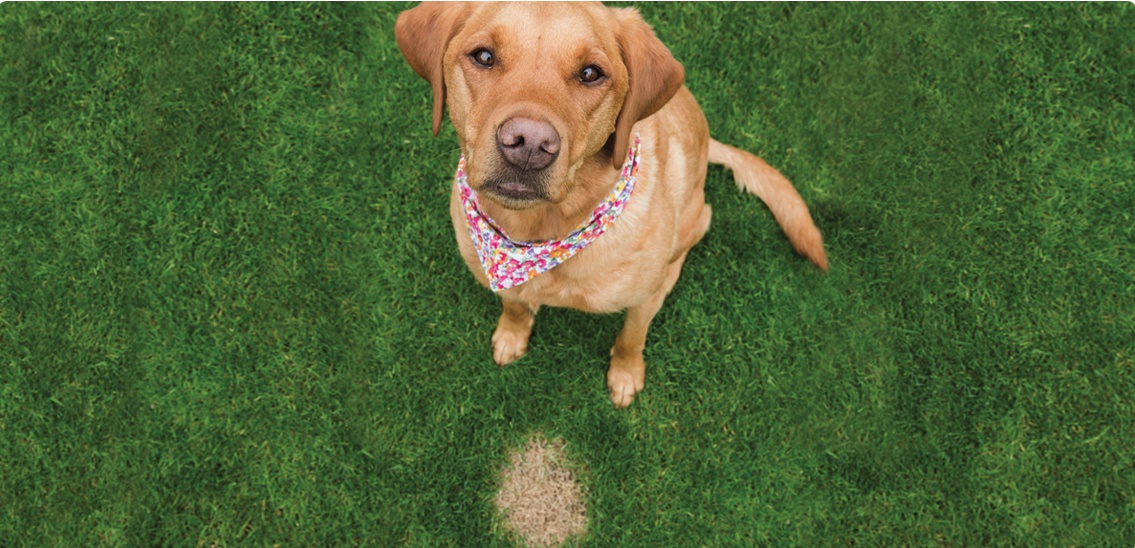
Dog urine is often one of the leading causes of dead patches in our lawns. Urine burns can be particularly frustrating as the solution is not always clear. We have looked into a variety of options that could help to stop or reduce the effect of urine burns on your lawn.
But first…

Why Does My Dog’s Urine Kill My Lawn?

Protein taken in by dogs is excreted through the dog’s urine as nitrogen. A dog’s urine can be quite concentrated with nitrogen, our lawns can become burnt and die off. This can become particularly annoying, especially when these patches are in areas of high visibility or of which you wish to enjoy.

Urine Burn Prevention Tips

Dog Rocks

  • A popular option by many dog owners is Dog Rocks. Dog Rocks help by filtering out impurities in water, such as tin, ammonia and nitrates. These rocks are simply added to your dog’s water bowl where they are claimed to make the necessary adjustments for burn-free urine. Although this product does not help areas that have already been affected by urine burn, it can, however, help to stop more spots from occurring. Dog Rocks can start working 8-10 hours after being placed into your dog’s water bowl and will need replacing every 2 months.

dog rocks

Watering and Irrigation Methods

If you are able to dilute your dog’s urine before it is able to absorb and dry, you will be able to limit the concentration and reduce the likelihood of burning. If you have an irrigation or watering system that you can add a timer too, you could set it to come on more regularly throughout the day or specifically in areas that you know your dog regularly uses. While this may not be frequent enough to be effective all of the time, it may be enough to significantly reduce the amount of burning that is occurring.

Of course, if you happen to be around when your dog does their business, a quick blast with the hose will greatly limit burns to your lawn.

Dietary Adjustments

When looking to make changes to your dog’s diet to reduce the impact of urine, it is recommended that you contact your local veterinarian to ensure you are still providing your furry friends with their essential nutrient requirements and not causing them any harm.

Some options include:

  • Filtering your dog’s water before adding it to their water bowl. Filtered water can work in a similar way to Dog Rocks, by removing impurities in the water. If you do not have access to a filtered water tap, a popular option is to use a filtered water jug. These jugs often come with a removable filter which can be changed every 2 months.
  • By feeding your dog a high-quality and well-balanced diet with the appropriate protein levels for your dog’s breed, you should be able to reduce the concentration of nitrogen in your dog’s urine.
  • Adding one teaspoon of apple cider vinegar to your dog’s water is claimed to help remove nitrogen from your dog’s urine. However, it is important to note that there is no substantial evidence that this method will be successful. If you do decide to try this method, we recommend that you use natural apple cider vinegar from a health food store and get in contact with your local vet prior to use.

dog urine burns

Training

  • Training your dog to only use one area of your lawn may be an effective option to help stop widespread damage. It is best to choose an area of your lawn that isn’t used as often or is not visible from where you like to relax and enjoy your garden.
  • Training your dog to use a synthetic pet potty mat could also be an effective option that won’t require any changes to your dog’s diet. There are a variety of pet potty mats available both online and in stores. It is important to note that this option may be timely as training is required but can provide a long-term solution.
  • Similar to a synthetic potty mat, you can make your own pet potty mat using turf. This way your dog will still be able to have the same feel of grass underfoot while doing its business. Use a shallow container or tray that is easy for your pets to walk into, place a role of turf into the tray and replace turf as needed. Again, this will take time to train your dog to use but will stop your dog from urinating on your lawn.

Treatment for Dog Urine Burns

Once the urine burn has occurred, the burnt turf, may not grow back. But there are a few things you can do to help the area recover quickly. Firstly, rake out the dead plant material and lightly raise the area by adding a small amount of topsoil. You can also add some dolomite lime which will reduce the acidity caused by the urine burn in the soil, making it more favourable for new growth. Follow this up with regular watering and mowing and you will help to encourage lateral growth and further thickening of the lawn.


As always, if you have any more questions please don’t hesitate to contact us for free expert advice on 1800ALLTURF (1800255873) or 07 5543 8304.