How to Get Rid of Weeds in Lawn

A healthy lawn will always combat weeds! It is extremely important to note that, regular maintenance is key to maintaining a weed free lawn. This includes regular mowing, watering and fertilising to promote healthy growth and crowd out any weeds!

Understanding Lawn Weeds

Heres a few common weeds you may have heard of or even have found in your lawn:

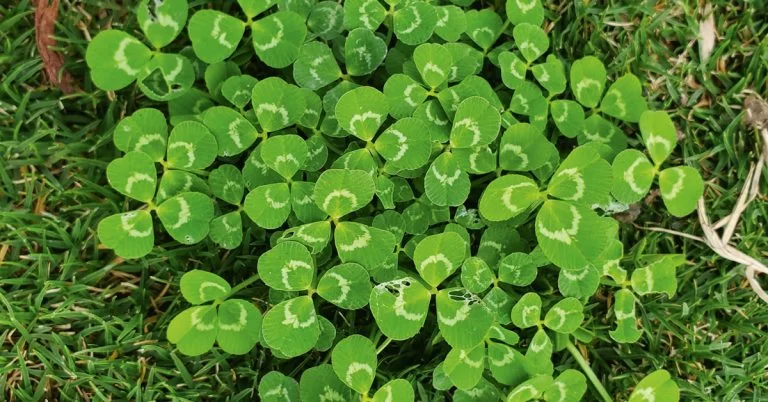
  • Clover
  • Creeping Oxalis
  • Crowsfoot/Grabgrass
  • Nutgrass or Mullumbimby Couch
  • Bindii
  • Winter Grass
  • Cudweed
  • Soursob
  • Onion Weed
  • Summer Grass
  • Paspalum

Weeds are invasive and are the bane of all lawn owners! Weeds will compete with your lawn for essential resources such as oxygen, water and nutrients in the soil. Weeds will also result in the weakening of your lawn, making it more prone to other issues such as pest infestation, drought and disease.

Preparing to Remove Weeds

There are many different tools available on the market for removing weeds!

  • Weed Pulling Tools
  • Cultivators
  • Shovels
  • Garden Tool Sets
  • Weeders
  • Organic Weed Killers
  • Weed Killers

Always ensure when using weed killers that you follow the label rates and instructions and wear the appropriate safety wear as recommended on the bottles.

How to Get Rid of Weeds Before Laying Turf

It is very important to ensure you remove all weeds or previous grass types prior to installing your brand new lawn! If you do not do so, these weeds and other grass types will make their way through your new lawn.

Step-by-step guide to weed removal prior to laying new turf:

  1. Clear the area of plants, grasses and any other unwanted weed growth. Pay particular attention to Kikuyu and Couch varieties as these are extremely invasive and may require more than one total kill application. Clearing the area is best done by spraying with a total kill, such as Roundup or Zero (Glyphosate). These needs to be complete a minimum of ten to fourteen days prior to laying your new lawn.
  2. Cultivate or Rotary Hoe dead matter into the existing soil base or export/remove the dead matter off site.
  3. Add in a turf underlay product to make sure you have the best base for your new lawn. We recommend 100mm as a good growing medium for a new lawn. Always be sure to double-check your pH levels to ensure it is still within the appropriate range of 5.5 to 7.

If you’d like to read more about proper soil preparation – read our blog on How to Prepare Soil for Turf.

How to Get Rid of Weeds in Lawn Naturally

There are benefits to controlling weeds in your lawn naturally. It helps keep your soil free from chemicals which in the long term is better for us, our families, our food and our planet.

Effective natural weed control techniques:

  • Boiling water method
  • Vinegar method
  • Mulching gardens to suffocate weeds
  • Removing weeds by hand

Preventing Weed Growth in Lawn

Keep your lawn healthy!

The obvious but not always easy solution to preventing weeds in your lawn is to keep your lawn healthy. A healthy lawn will combat any weeds due to it’s strong, deep and thick root system and dense growth that makes it hard for weeds to grow through.

  • Use a fertiliser such as Lawn Solutions Premium Fertiliser. To find out more about when and how often to fertiliser read out latest blog How Often Should You Fertiliser Your Lawn.
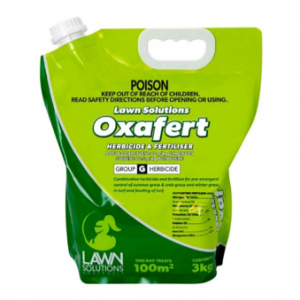
  • Protect with pre-emergents such as Lawn Solutions Oxafert. Pre-emergents are the best tool for preventing weeds emerging in your lawn. They will stop weed seedling from germinating in the soil.
  • Be vigilant and treat weeds as soon as they appear in your lawn. One year’s seeds is seven year’s weeds! Pull any weeds that pop up in your lawn before they have a chance to go to seed. Once gone to seed, this is when they become particularly stubborn to eradicate.
  • Mow regularly, some weeds can be suppressed with regular mowing.
  • Keep your lawn healthy with a regular watering routine. For an established lawn, our recommendation is to water deeply once per week. Preferably in the morning, otherwise in the afternoons when the temperatures are ideal.

Chemical Weed Control Options

Selective herbicides are able to selectively treat broadleaf weeds or grassy weeds, depending on the chemical without harming your lawn, however non-selective herbicides like glyphosate will kill any plant they come into contact with.

Always make sure to identify what weed you have and what your grass type is to ensure you don’t accidentally kill your lawn! If you are unsure, please email photos through to us at info@allturfsolutions.com.au where we are able to help identify and recommend what product you can use to treat.

Be sure to always follow labelled rates and ensure you wear the appropriate safety wear as recommended on the products labels. Safety comes first!

Frequently Asked Questions

1. How long should I wait to lay turf after applying weed killer?

Needs to be completed a minimum of ten to fourteen days prior to laying your new lawn.

2. Can natural methods be as effective as chemical herbicides?

Yes and no, the natural way can be labourous, especially if removing weeds by hand. But you do have the benefits of keeping your soils free from chemicals.

3. What are the most stubborn lawn weeds and how to deal with them?

Some of the most invasive and stubborn weeds include Nutgrass, Mullimimby Couch and Creeping Oxalis. Nutgrass and Mullimimby Couch can be treated with products like Lawn Solutions Sedge Control whilst Creeping Oxalis can be treated with products like Bow & Arrow which is safe to use on Buffalo and Couch lawns.

Conclusion

The obvious but not always easy solution to preventing weeds in your lawn is to keep your lawn healthy. A healthy lawn will combat any weeds due to it’s strong, deep and thick root system and dense growth that makes it hard for weeds to grow through.

Always pick the best method that suits your lawn and your needs! If you prefer to hand remove weeds rather than applying chemical than have at it!! You will reap the benefits of a chemical free environment!

Remember – one year’s seeds, seven year’s weeds.

How Often Should You Fertilise Your Lawn: A Comprehensive Guide

Introduction

Fertilising your lawn is a necessity! It keeps your healthy green lawn looking amazing all year round. In this blog we discuss tips on how often should you fertilise you lawn!

Key Factors Affecting Fertilisation Frequency

  • When it comes to Queensland – our grasses are all warm-season grasses. Depending on your what turf variety you have this will effect how often you should fertilise your lawn.
  • Your soils pH is very important, poor soil quality can lead to ongoing issues with your lawn. We’d definitely recommend testing your soils pH to ensure you are giving your lawn to correct amendments and fertilisers for it’s needs!
  • Always keep a close eye on the weather! Make sure that you aren’t planning on fertilising your lawn when there’s some nasty wet weather forecasted! Too much rain shortly after application can reduce the effectiveness making it a waste of your time & money!

Establishing a Fertilisation Schedule

  • Most warm season grasses like buffalo, couch and zoysia love a feed in spring and again after winter once the lawn starts to grow again. A feed around Australia Day and again after Easter or Anzac Day to help boost your lawn heading into the cooler months.

How to Create a Fertilisation Calendar for your lawn!

  1. Understanding your lawn! Make sure you know what turf variety you have!
  2. Complete a soil pH test to help understand what nutrients your lawn needs!
  3. Select the right fertiliser! Think the following factors: Nutrient content, slow release verus quick release, organic versus sythentic pros and cons.
  4. Implement your plan! Make sure to pay attention to timing, fertilisation application techniques and ongoing monitoring to ensure your schedule is working!

Signs Your Lawn Needs Fertilisation

  • Looking a little worse for wear
  • Lacking in colour
  • Reduced growth
  • Brown or yellowing patches
  • Thinning or bare patches

Depending on your variety, we recommend sticking to our recommended fertilisation frequency to ensure the best outcome for your lawn. Check out our blog -> When to Fertilise Your Lawn: A Seasonal Guide for all the tips and tricks on how often to fertiliser and how to do so.

Types of Fertilisers and Their Impact on Frequency

Synthetic Fertilisers are manufactured from minerals, gasses from the air and inorganic waste materials where as Organic Fertilisers are derived from natural sources such as microbes, organic waste and other similar materials.

Slow release fertilisers make nutrients available to your lawn for an extended period for up to two months whereas a quick release fertiliser is going to make nutirents available for a period of approximately two weeks. It’s very important to use slow release fertiliser during the growing seasons.

Choosing the right fertiliser for your lawns needs:

  1. Determine your turf variety
  2. Determine your soil quality
  3. Choose the right feriliser nutrients for your lawn, common nutrients:

Nitrogen

Postassium (K)

Phosphorus

  1. Talk to the experts! Not sure on what fertiliser to use? Reach out to our friendly staff for advice!

Practical Tips for Effective Fertilisation

Granular

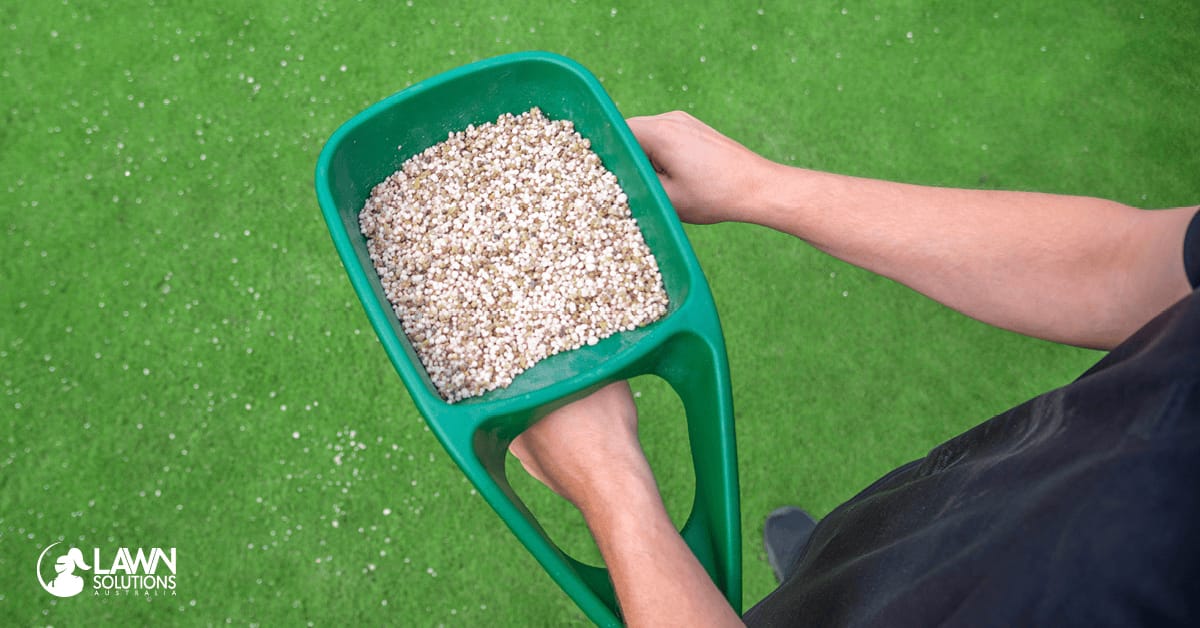
Granular Fertilisers are the easiest and most popular option to use. Granular products to take longer to be absorbed by your lawn but usually will release the nutrients over a longer period of time.

  • Make sure to measure out your lawn size to ensure you apply fertiliser evenly and at the correct rate.
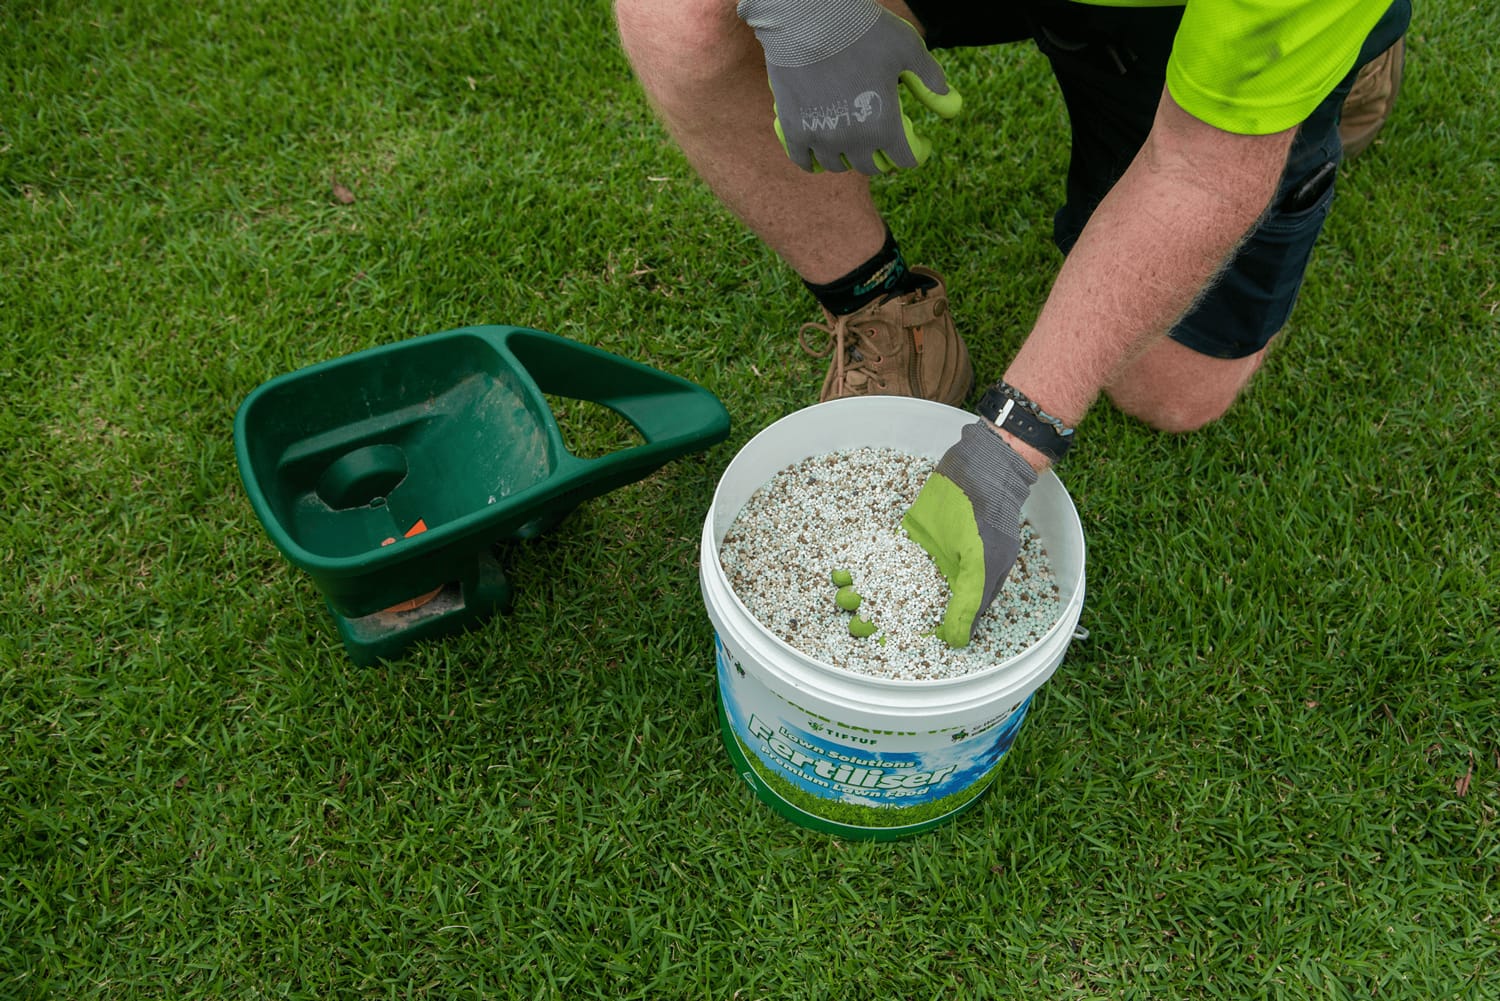
  • We always recommend using a fertiliser spreader to apply granules to ensure a smooth and even application to cover the area as best you can.
  • We recommend walking up and back, then across in the opposite direction to get the best coverage.
  • Always keep an eye on how wide you are spreading the granules to ensure you dont double up and burn your lawn!

Liquid Fertilisers

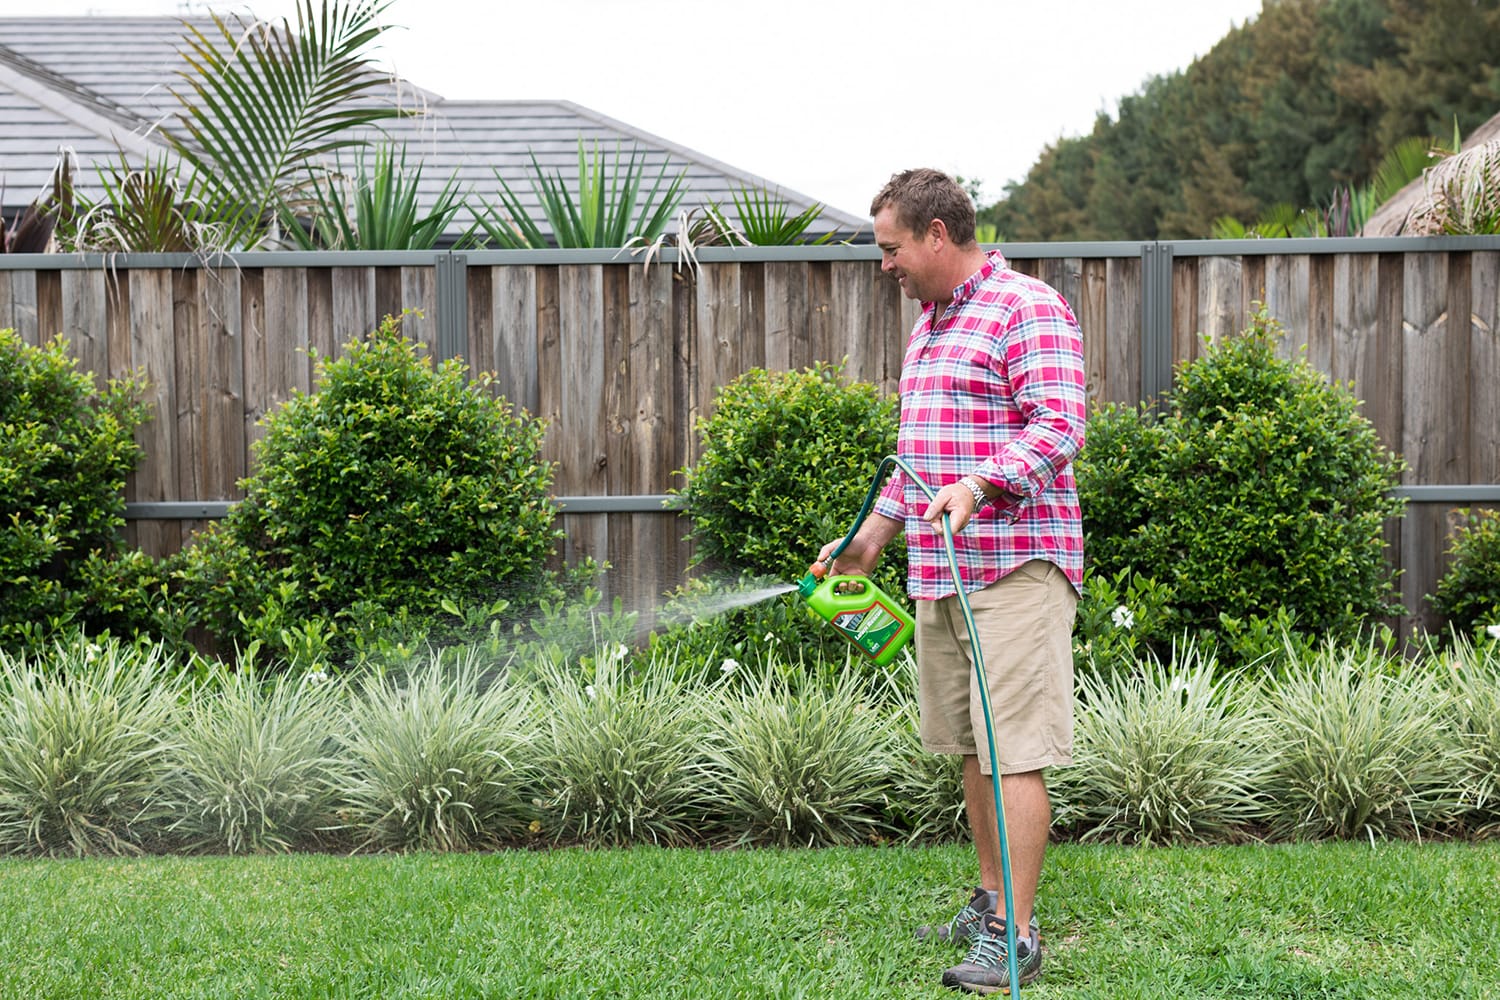
Liquid Fertilisers work faster than granular fertiliser as they are applied directly onto the leaf and are absorbed quickly. This will help give your lawn a quick but short boost!

  • Again, before applying make sure to measure out your lawn size to ensure you apply fertiliser evenly and at the correct rate.
  • Spray your fertiliser evenly by walking in an organised fashion to achieve an even application.
  • Always keep an eye on how wide your sprayer is to avoid doubling up!

Fertilising your lawn the right way can help improve its appearance while keeping it healthy. While fertilising is quite simple, there is a bit more to it than simply chucking it out or spraying it on.

Time to water!! This is an important step to help avoid burning on your lawn. Not all fertilisers need to be watered in, but the majority do. If you are unsure, read your products label or check with the product manufacturer.

Types of Fertiliser

Common Mistakes to Avoid

  • Over fertilising your lawn can cause some major issues! It will cause sudden plant growth, particularly leaf growth & thatch. This issue with this is that the roots will not experience the same amount of rapid growth and will then be unable to supply the amount of water and nutrients your lawn needs.
  • Under fertilising can reduce growth and paleness of colour within your lawn! Make sure to reach the labelled rates to ensure you are applying the correct amount!
  • Applying fertilisers at the wrong time of day can be detramental to your lawn! Avoid burning your lawn and apply fertiliser in the late afternoon or early morning. Never during the middle of the day.

FAQs

How can I tell if my lawn is over-fertilised?

Signs of over-fertilisation include yellowing or browning of grass blades, excessive growth that requires frequent mowing, and a buildup of thatch. To prevent this, follow recommended application rates and schedules.

Is it okay to skip a scheduled fertilisation?

Skipping a scheduled fertilisation occasionally may not severely impact your lawn, but consistent neglect can lead to nutrient deficiencies. If you miss an application, resume your schedule as soon as possible and monitor your lawn’s health.

What’s the best way to track my fertilisation schedule?

The best way to track your fertilisation schedule is to create a lawn care calendar. Note the recommended fertilisation times for your grass type, and set reminders to stay on track. Adjust the schedule as needed based on weather conditions and your lawn’s response.

Conclusion

A great way to keep on top of your fertilising would be to create yourself a little go to guide depending on your lawn type! Always feel free to reach out to our friendly staff with tips on the best fertilisers to use and when to use them!

Please remember to always follow labelled rates and ensure you are purchasing the right fertiliser for your lawns needs! pH tests can be your best friend when working out what amendments and fertilises your lawn really needs!

How to Fertilise Your Lawn: Step-by-Step Guide

Fertilising your lawn is a necessity! It keeps your healthy green lawn looking amazing all year round. In this blog we discuss tips on how to fertilise lawn!

Preparing Your Lawn for Fertilisation

• Mow your lawn before fertilising.

• Rake and removing debris for better fertiliser absorption.

• Conduct a soil test to determine nutrient needs to make sure you are purchasing the correct fertiliser for your lawns needs!

Choosing the Right Lawn Fertiliser

Synthetic Fertilisers are manufactured from minerals, gasses from the air and inorganic waste materials where as Organic Fertilisers are derived from natural sources such as microbes, organic waste and other similar materials.

Slow release fertilisers make nutrients available to your lawn for an extended period for up to two months whereas a quick release fertiliser is going to make nutirents available for a period of approximately two weeks. It’s very important to use slow release fertiliser during the growing seasons.

Choosing the right fertiliser for your lawns needs:

  1. Determine your turf variety
  2. Determine your soil quality
  3. Choose the right feriliser nutrients for your lawn, common nutrients:

Nitrogen

Postassium (K)

Phosphorus

  1. Talk to the turf experts! Not sure on what fertiliser to use for a healthy lawn? Reach out to our friendly staff for advice!

Types of Fertilisers

There are 2 main types of lawn fertilisers available on the market, granular and liquid fertiliser.
Granular Fertilisers

Granular Fertilisers are the easiest and most popular option to use. Granular products to take longer to be absorbed by your lawn but usually will release the nutrients over a longer period of time.

Always read the labelled rates and ensure you work out the correct application rate for your lawn size. The most important thing is to spread the fertiliser evenly and cover the area as best you can.

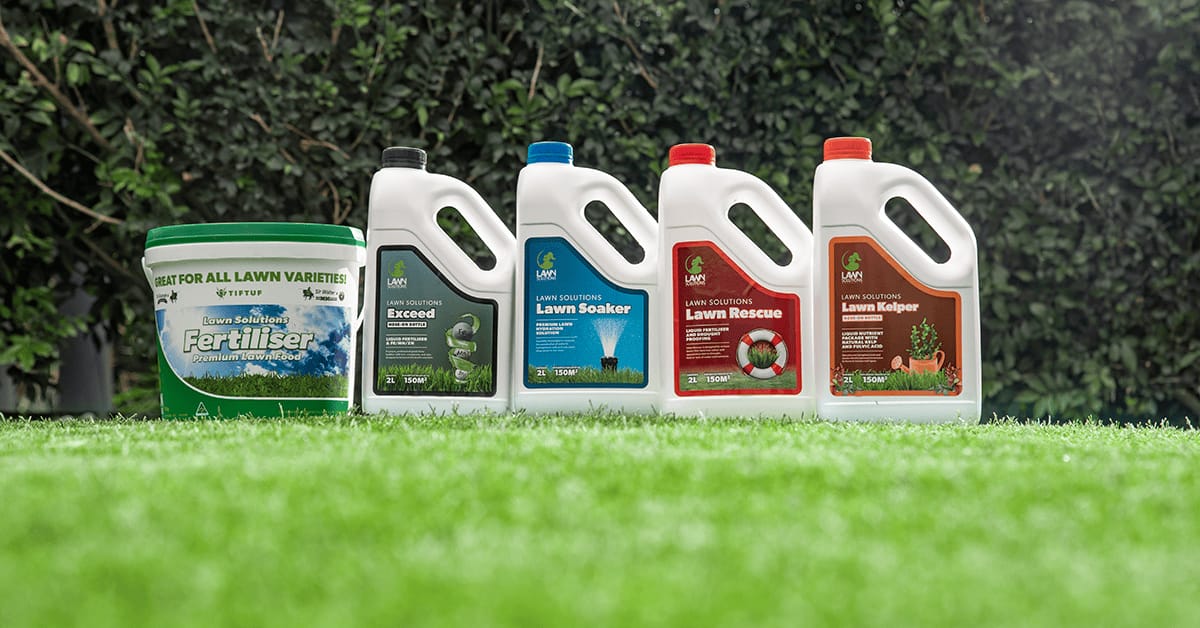
Lawn Solutions Fertiliser Premium Lawn Food is a professional blend of both slow and fast release granules containing all the essential nutrients and trace elements for all lawn types.

Liquid Fertiliser

Liquid Fertilisers work faster than granular fertiliser as they are applied directly onto the leaf and are absorbed quickly. This will help give your lawn a quick but short boost!

Again, always read the labelled rates and ensure you work out the correct application rate for your lawn size. The most important thing is to spread the fertiliser evenly and cover the area as best you can.

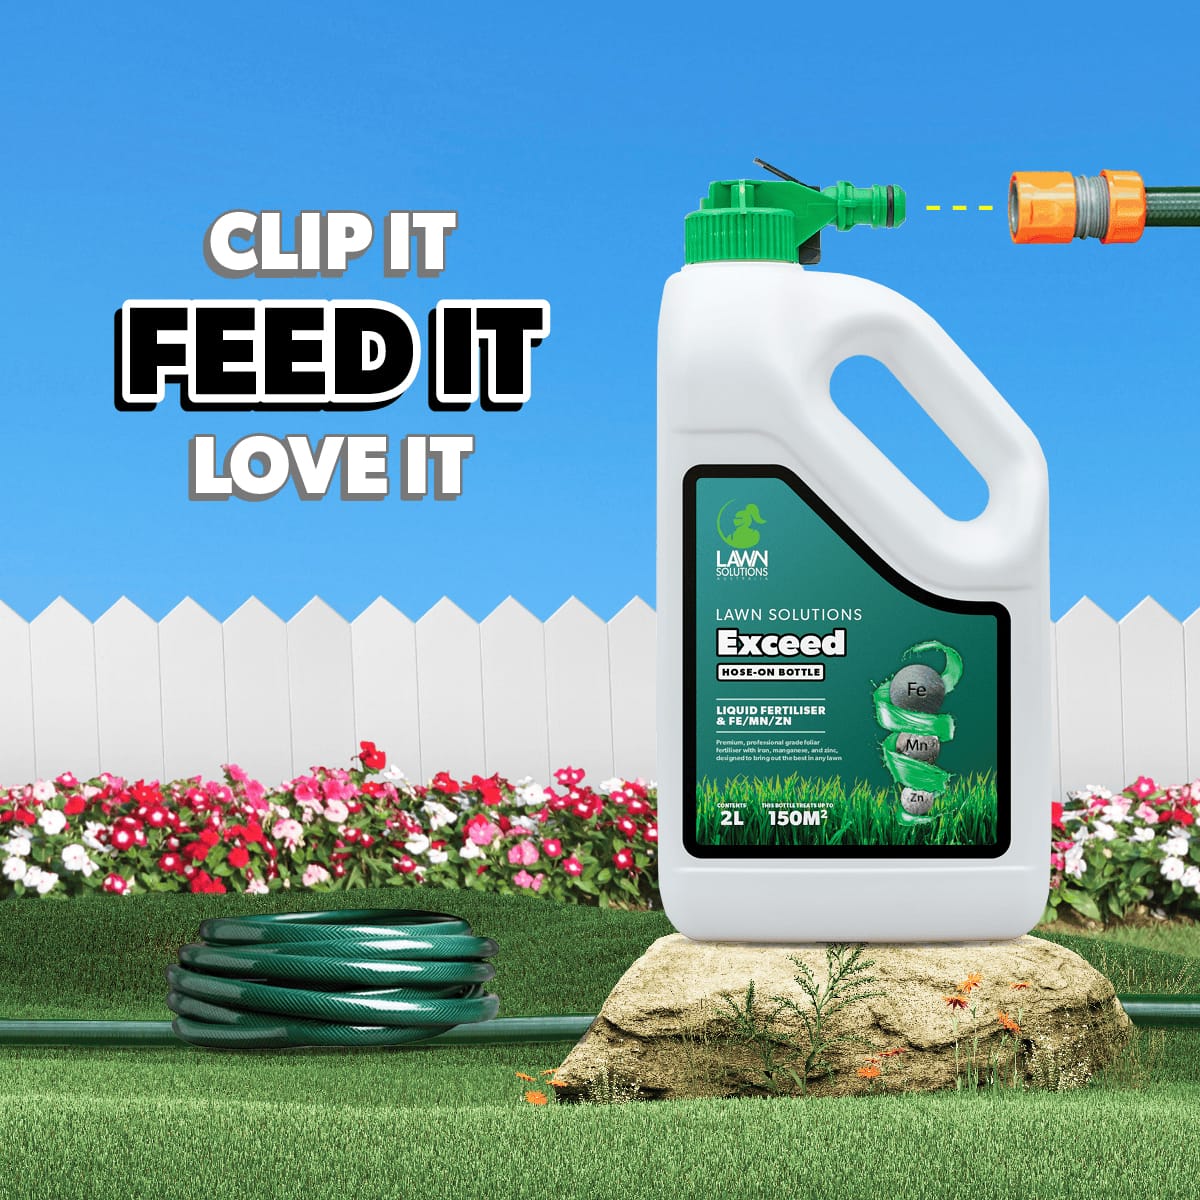
Exceed is a premium, professional foliar fertiliser designed to bring out the best in any lawn.

Tools and Equipment for Fertilisation

Broadcast VS Drop Spreaders

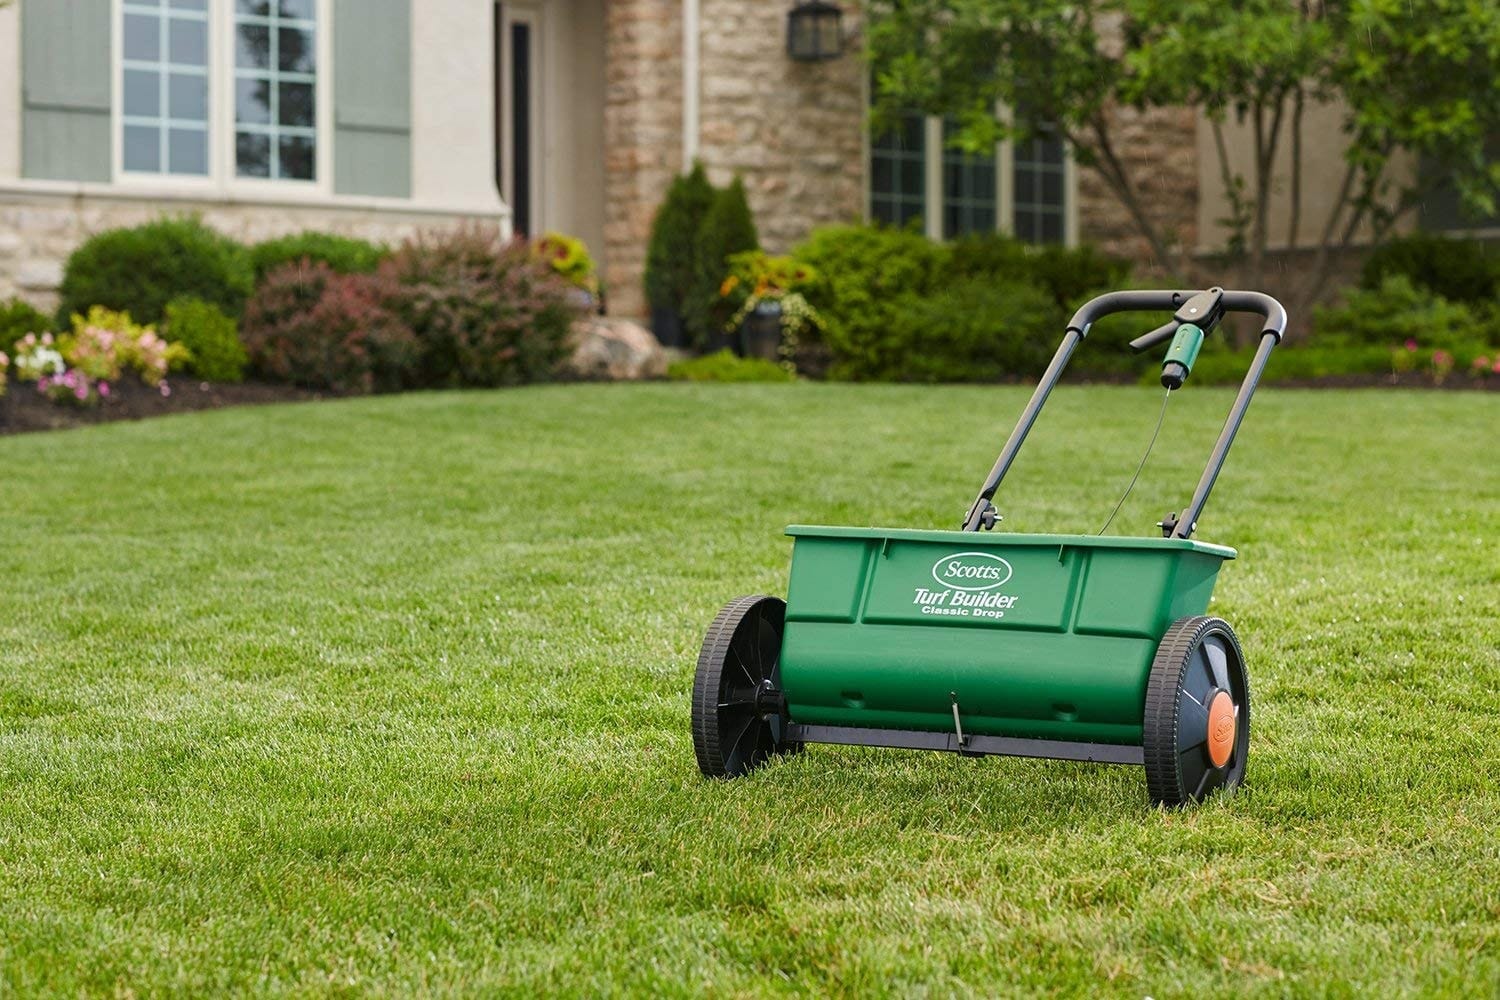
Broadcast Spreaders scatter the lawn fertiliser over a large area in a fan-like pattern. Broadcast Spreaders are best for covering large areas of lawn efficiently.
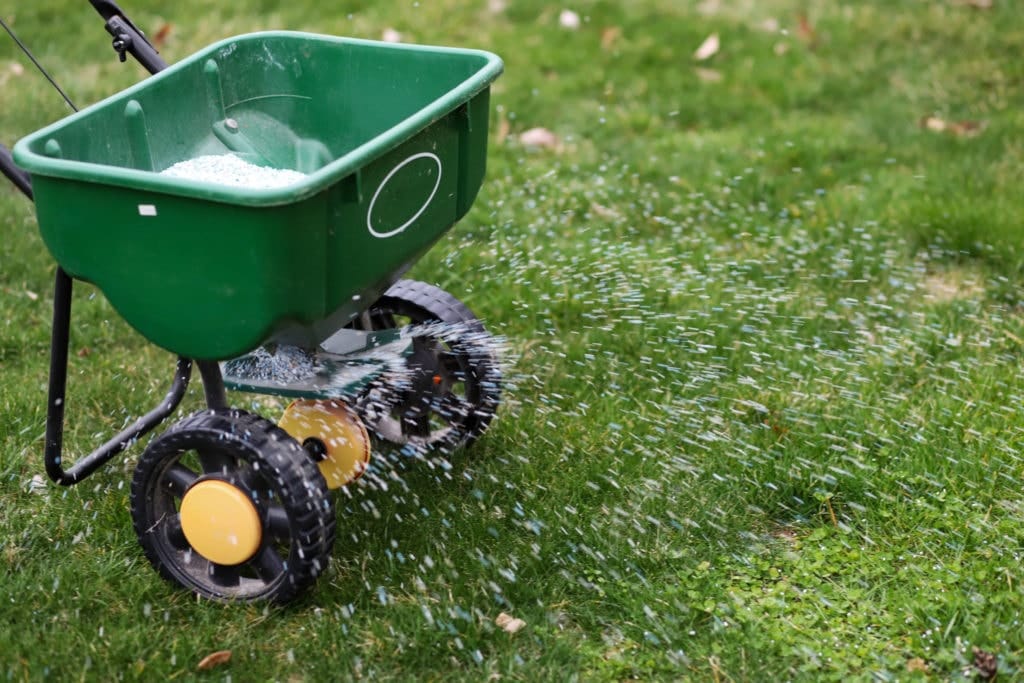
Drop Spreaders are gravity-fed and drop the fertiliser straight downward in neat rows with a great deal of accuracy. These are easy to use and control and can make it easy to work in around obstacles and tight spots. However, there is a danger of stripping if you don’t overlap your wheel paths.
Hand-held Spreaders

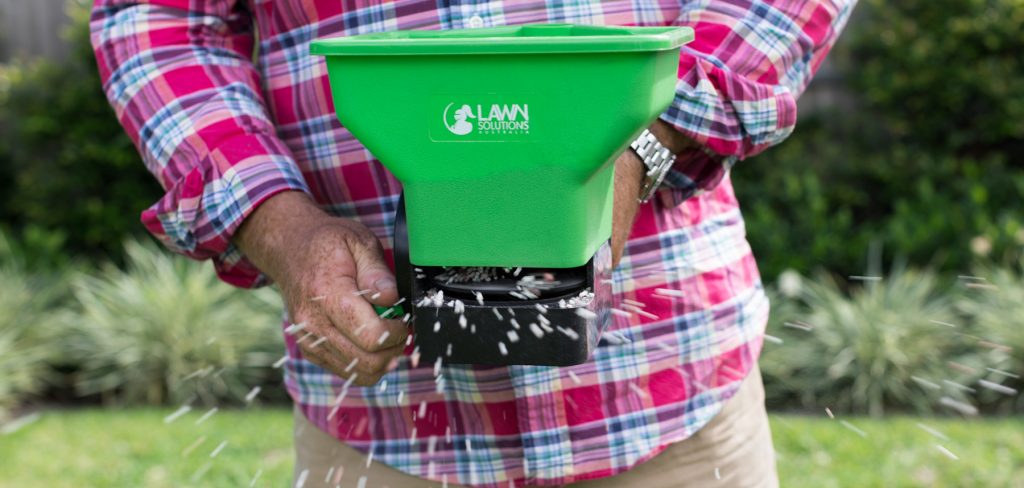
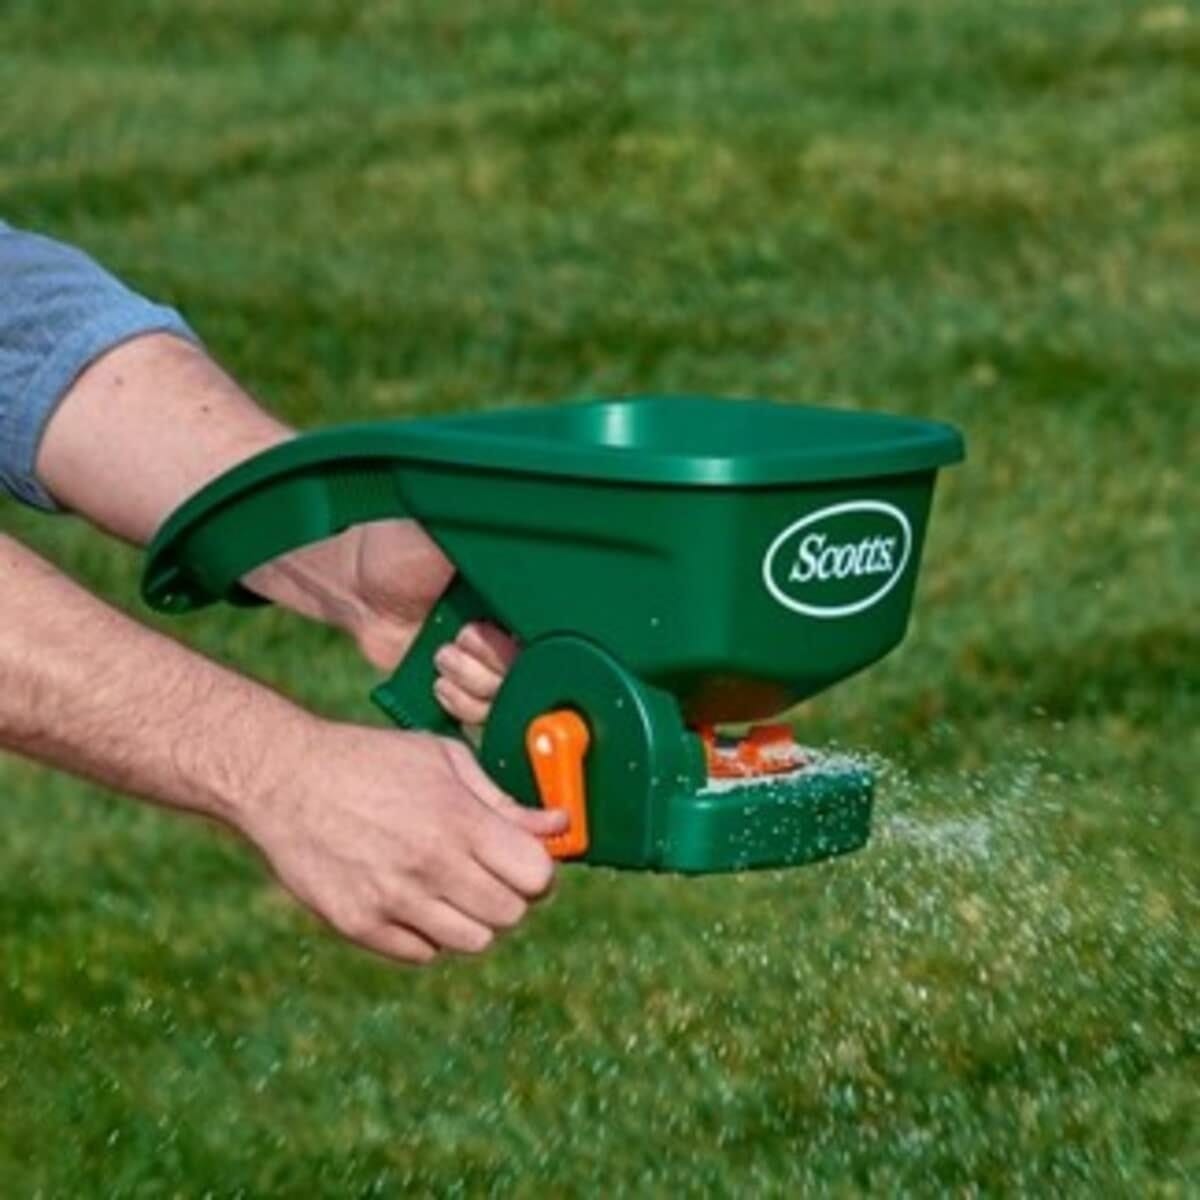
Hand-held spreaders are ideal for those lawns that are too small for even the smallest of push mowers! Hand-held spreaders can hold approximately 300m2 of fertiliser and it provides an even dispersal and is very simple to use.
Backpack or Knapsack Sprayers

When working with liquid fertilisers, you’ll need a sprayer. We’d recommend a knapsack or backpack sprayer. These are easy to use, especially the backpack sprayer as you don’t have to carry around the knapsack whilst you apply!

Always make sure to wear gloves when handling any fertiliser chemicals & if needed, a mask for ventilation.

Step-by-Step Fertilisation Process

Make sure to measure out your lawn size to ensure you apply an even amount of fertiliser and at the correct rate.

We always recommend using a fertiliser spreader to apply granules to ensure a smooth and even application to cover the area as best you can.

We recommend walking up and back, then across in the opposite direction to get the best coverage.

Always keep an eye on how wide you are spreading the granules to ensure you dont double up and burn your lawn!

Time to water!! This is an important step to help avoid burning on your lawn. Not all fertilisers need to be watered in, but the majority do. If you are unsure, read your products label or check with the product manufacturer. Read more below about Irrigation programming.

Post-Fertilisation Lawn Care

The following information is a guide only. Evaporation and transpiration rates can vary considerably depending on soil type, grass variety and microclimate.

Water requirements vary throughout the year and the basic rule is the hotter the temperature the more water is required to replace soil moisture loss via evaporation and plant usage.

Some of our turf grasses go dormant in the winter months and water requirements is very low however our winters can still be mild to warm and usually drier hence evaporation can still take place so watering may still be required. The following graph represents average water requirements per week for the months indicated.
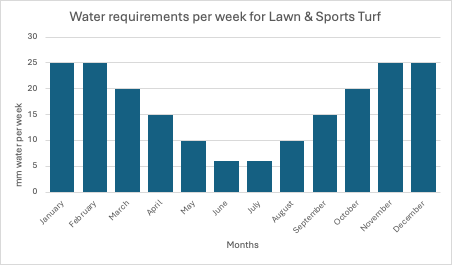
Rain fall events will replace the need to run irrigation during those periods. Without soil moisture probes it can be difficult to judge when is the best time to commence your watering schedule.

Irrigation Programming

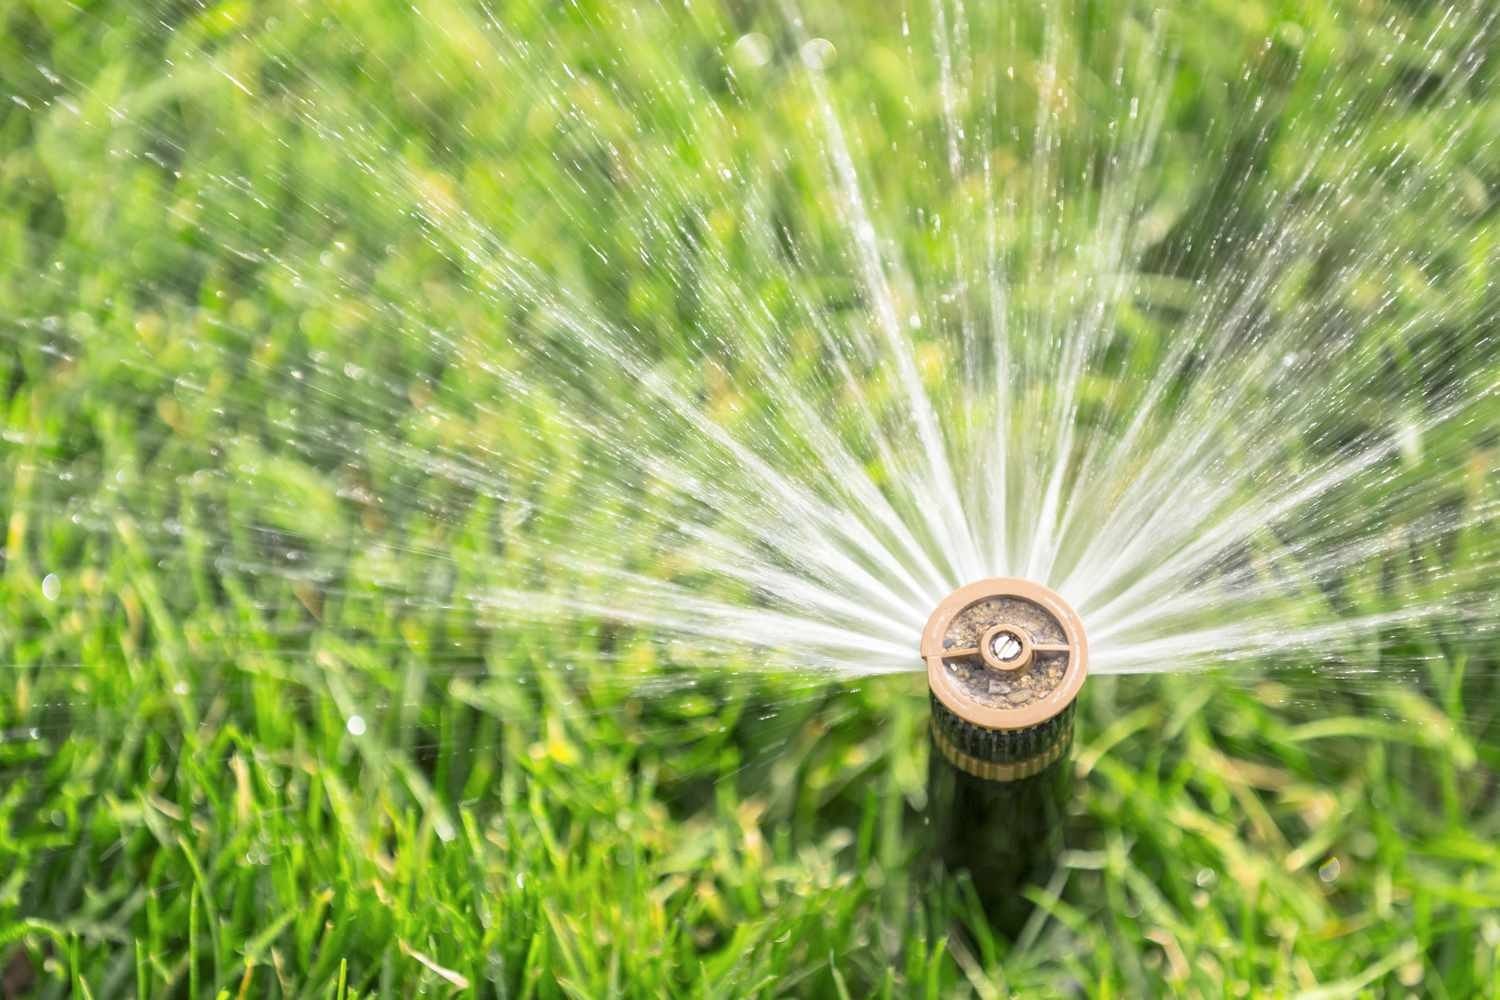
Irrigate between 6pm and midnight or throughout the night until 8am if you have long program times or events limiting night time irrigation. This will help reduce evaporation losses and minimise risk of disease. Applying more irrigation than is required will only waste water as the turf grass cannot use it. The exception to this rule is during periods of prolonged drought sub soil moisture can be lost and it is desirable to try to re wet the sub soil and some of our grasses and plants tap into this sub soil especially our drought tolerant varieties that have massive root systems. The irrigation controller should be set or adjusted each month to reflect the requirements in this guide.

Less frequent watering with longer run times will provide deeper water movement through the profile. This will encourage deeper root systems and a plant that is more adaptable to drought. As a guide water once per week in winter and twice a week in summer, adjusting the run times in line with chart above. Heavy or compacted soil may prevent water infiltration in one application so cycle the irrigation to provide multiple run times through the night to apply the required amount.

To calculate your sprinkler run times it is best to measure the amount of water applied utilising the catch can method. Running off the manufacturers guide is ok but there are variables to consider like available pressure and flow. Nozzle size, sprinkler lay out and wind all play a part in the final precipitation. The catch can method is where rain gauges or open cans (cans must be open on the top and sides even) are placed on the field between sprinklers. An average can be calculated, and a run time programmed to provide the required amount of water.
Common Fertilisation Mistakes to Avoid

  • Over-fertilising your lawn can cause some major issues! It will cause sudden plant growth, paticularly leaf growth & thatch. This issue with this is that the roots will not experience the same amount of rapid growth and will then be unable to supply the amount of water and nutrients your lawn needs.
  • Under-fertilising can reduce growth and paleness of colour within your lawn! Make sure to reach the labelled rates to ensure you are applying the correct amount!
  • Applying fertiliser at the wrong time of day can be detrimental to your lawn! Avoid burning your lawn and apply fertiliser in the late afternoon or early morning. Avoid applying fertiliser during the middle of the day.

FAQs

How soon can I mow my lawn after fertilising?

It’s best to wait at least 24 to 48 hours after fertilising before mowing your lawn. This allows the fertiliser to settle into the soil and the grass to absorb the essential nutrients effectively.

Can I fertilise my lawn before a rainstorm?

Light rain can help fertiliser absorb into the soil, but a heavy rainstorm can wash away the fertiliser before it has a chance to be effective. Ideally, fertilise when light rain is expected or water the lawn yourself after application.

What should I do if I accidentally over-fertilise?

If you suspect over-fertilisation, water your lawn thoroughly to help dilute and wash away excess fertiliser. Monitor your lawn for signs of nutrient burn and avoid additional fertilisation until the grass recovers.

Conclusion

Remember to always follow labelled rates and ensure you are purchasing the right fertiliser for your lawns needs! Soil pH tests can be your best friend when working out what amendments and fertilisers your lawn really needs!

A great way to keep on top of your lawn fertilising would be to create yourself a little go to guide depending on your lawn type! Always feel free to reach out to our friendly staff with tips on the best fertilisers to use and when to use them!!

When to Fertilise Your Lawn: A Seasonal Guide

Introduction

Fertilising your lawn is a necessity! It keeps your healthy green lawn looking amazing all year round. In this blog we discuss tips on seasonal lawn care and when to fertilise lawn.

Understanding Your Lawn’s Needs

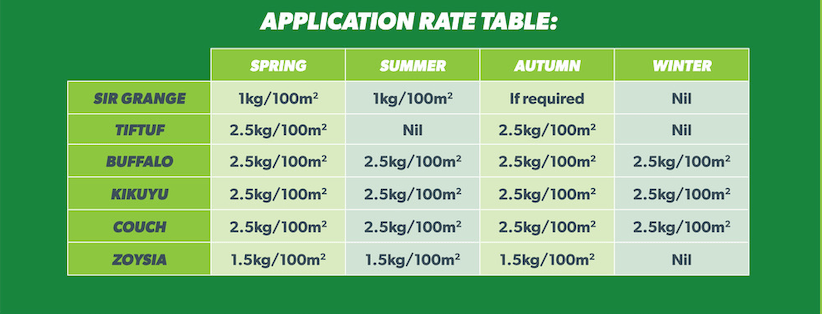
Application Guide for Lawn Solutions Fertiliser


Application Guide for Exceed Liquid Fertiliser

Completing a soil test on your lawn can help you assess what nutrients your lawn & soil needs to ensure you are applying the correct fertilisers for your lawns requirements.

Best Times to Fertilise Your Lawn

Spring Fertilisation

Early Spring vs Late Spring – For the first application it is best to apply in late spring just as your lawn is beginning to actively grow. Early spring is when your lawn is putting all it’s energy into root development so if you apply fertilisers too early then it will divert your lawns energy into leaf development too soon.

Spring is such an important time to fertilise, as your lawn is coming out of winter dormancy. Fertiliser applications will assist your lawn to jump into growth as the weather begins to warm up.

Types of Fertiliser

Summer Fertilisation

Summer fertilising can help your lawn maintain an even growth pattern. If you fertilised in spring, it’s now likely time for another application. Most slow release fertilisers available on the market will provide nutrient uptake for up to 12 weeks. If you fertilised late spring, then now is a great time for a top up.

Avoid burning your lawn, do not fertiliser when daytime temperatures reach over 30c. Wait for the temperatures to cool down.

Types of Fertiliser

Autumn Fertilisation

During the months of April-May, the temperatures begin to cool down and your lawn shifts it’s focus from growing leaf to root development. Apply a balanced fertiliser during early autumn to help strengthen the roots making your lawn more resilient to the upcoming cooler months.

Types of Fertiliser

Winter Fertilisation

There are definitely benefits to fertilising your lawn during winter. Once our soil temperatures drop below 14 degrees Celsius your grass will start to dlow down and go semi-dormant for the upcoming cooler months.

Types of Fertiliser

Exceed Liquid Fertiliser as increased amounts of Potassium and Iron. Postassium is great for providing strength to the whole plant and helps cell function. Iron is great for strengthening your grass as well as improving leaf colour.

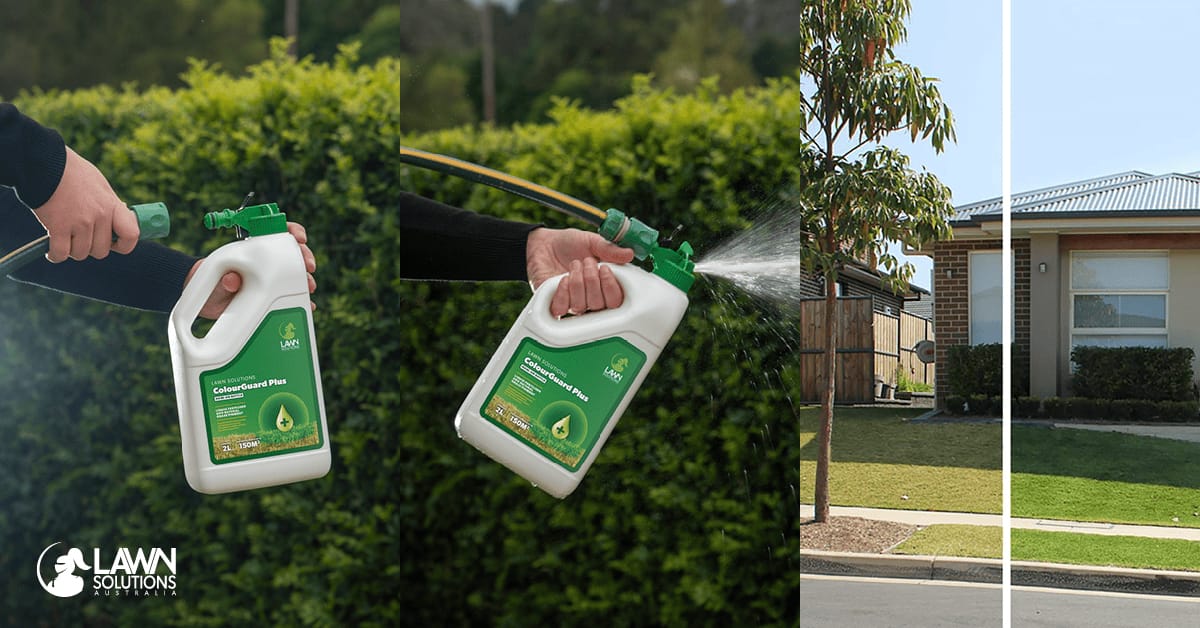
ColourGuard Plus will help improve your lawns colour and apperance during the colder months.

Frequency of Lawn Fertiliser

You want to make sure that when you fertiliser your lawn that you are applying it at the right time of the year to make sure you get the most out of your fertiliser.

The most common warm season varieties like couch, kikuyu, zoysia and buffalo love to be fed around mid-spring. Another around Australia Day in summer and then again around Easter or Anzac Day in Autumn this will help boost your lawn before heading back into winter.

Types of Fertilisers

There are 2 main types of fertilisers available on the market, granular and liquid fertiliser.

Granular Fertilisers

Granular Fertilisers are the easiest and most popular option to use. Granular products to take longer to be absorbed by your lawn but usually will release the nutrients over a longer period of time.

Always read the labelled rates and ensure you work out the correct application rate for your lawn size. The most important thing is to spread the fertiliser evenly and cover the area as best you can.

Lawn Solutions Fertiliser Premium Lawn Food is a professional blend of both slow and fast release granules containing all the essential nutrients and trace elements for all lawn types.

Liquid Fertiliser

Liquid Fertilisers work faster than granular fertiliser as they are applied directly onto the leaf and are absorbed quickly. This will help give your lawn a quick but short boost!

Again, always read the labelled rates and ensure you work out the correct application rate for your lawn size. The most important thing is to spread the fertiliser evenly and cover the area as best you can.

Exceed is a premium, professional foliar fertiliser designed to bring out the best in any lawn.

Tips for Effective Fertilisation

If applying granular fertilisers, a fertiliser spreader can be a very handy tool to have. Otherwise you can apply fertiliser using a smooth motion spreading by hand. We recommend walking up and back, then across in the opposite direction to get the best coverage.

Depending on what type of fertiliser you are using, will depend on what watering requirements are needed. Generally granular fertiliser needs the help of water for it to activate and for liquid fertiliser you should wait at least 24-48 hours before watering.

Remember to always follow labelled rates & application guides to ensure you are applying fertilisers correctly.

Common Mistakes to Avoid

Overfertilising your lawn can cause some major issues! It will cause sudden plant growth, paticularly leaf growth & thatch. This issue with this is that the roots will not experience the same amount of rapid growth and will then be unable to supply the amount of water and nutrients your lawn needs.

Your soils pH is very important, poor soil quality can lead to ongoing issues with your lawn. We’d definitely recommend testing your soils pH to ensure you are giving your lawn to correct amendments and fertilisers for it’s needs!

Applying fertilisers at the wrong time of day can be detramental to your lawn! Avoid burning your lawn and apply fertiliser in the late afternoon or early morning. Never during the middle of the day.

FAQs

Can I fertilise my lawn when it’s wet?

No, even though some fertiliser products need to be watered in on application. Applying fertiliser to your lawn when it is too wet can lead to the product failing and the plant not absorbing the nutrients. This includes both Granular and Liquid Fertiliser. Also, avoid fertilising right before heavy rain, as this can cause runoff and waste the fertiliser.

How do I know if my lawn needs fertiliser?

Signs that your lawn needs fertiliser include slow growth, a pale green or yellowish color, and thinning grass. Conducting a soil test can also help determine nutrient deficiencies and inform the appropriate fertiliser type and application rate.

What is the best time of day to fertilise my lawn?

The best time of day to fertilise your lawn is early in the morning or late in the afternoon. Avoid fertilising during the heat of the day, as high temperatures can cause the fertiliser to evaporate and potentially burn the grass.

Conclusion

Remember to always follow labelled rates and ensure you are purchasing the right fertiliser for your lawns needs! pH tests can be your best friend when working out what amendments and fertilises your lawn really needs!

A great way to keep on top of your fertilising would be to create yourself a little go to guide depending on your lawn type! Always feel free to reach out to our friendly staff with tips on the best fertilisers to use and when to use them!!
African Black Beetle | Lawn Grubs

African Black Beetle

Scientific name: Heteronychus arator

Black beetles can be a common sight in and around your lawn. They are a natural part of the ecosystem and play an important role. We sometimes hear from people who have noticed them in their lawn and are concerned that they may be damaging their grass.

Here’s what you need to know…

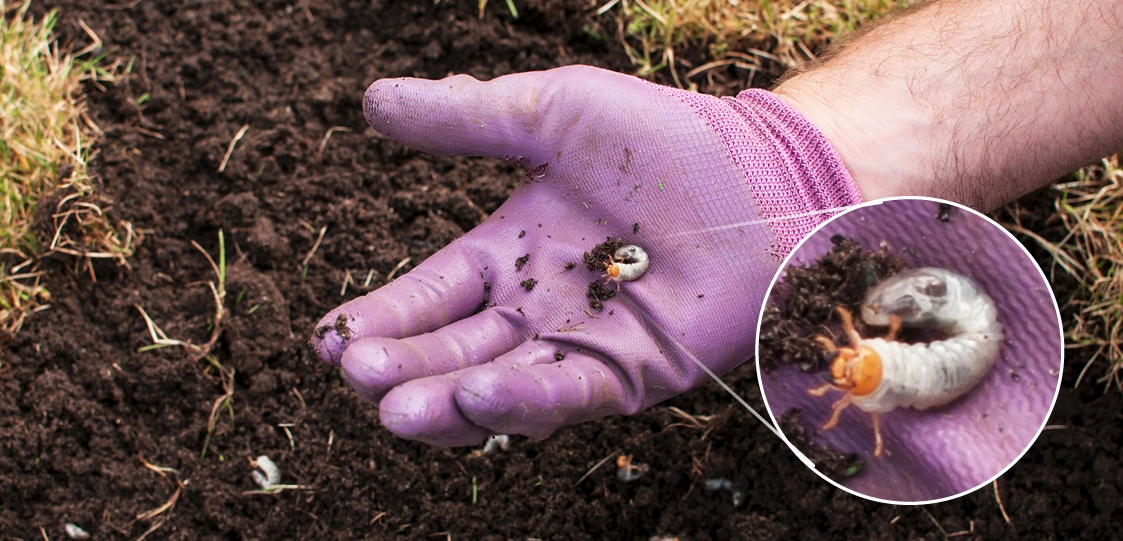
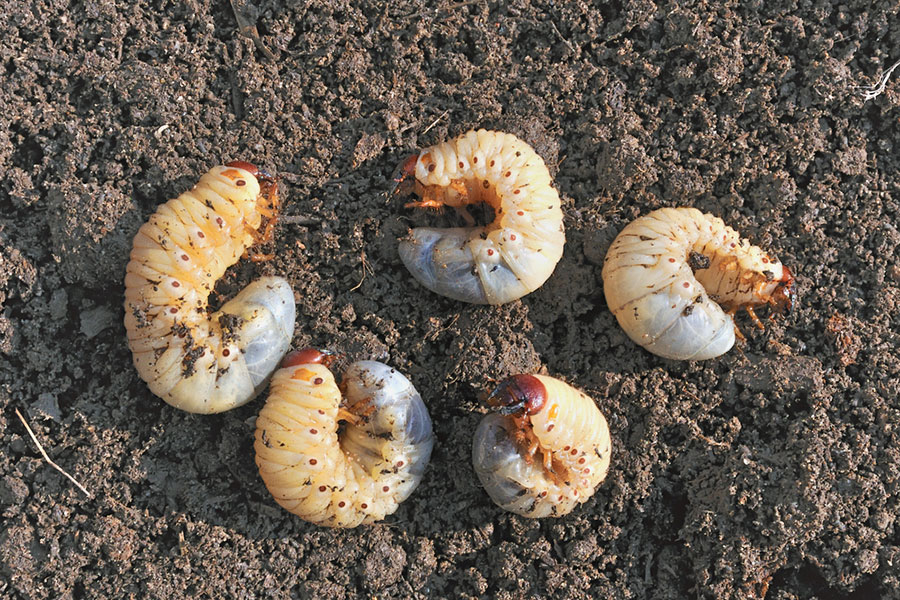
It is rare that adult black beetle will cause much harm worth worrying about, it’s the root feeding black beetle larvae that cause the most damage. So, it’s important to understand their lifecycle and signs of infestation, so that you can take prompt action when they become active.

Description

Black beetle eggs are laid in spring and early summer. After several weeks the eggs hatch and the larvae or grubs emerge that then feed on the grass roots. It is when large numbers of these eggs hatch that it is a serious problem for some lawns. These larvae develop through 3 stages, the fully-grown larvae at the end of the third stage are around 25mm long. You will need to be particularly vigilant as the weather warms up, usually September to March, and after heavy rain.

The larvae then move into pre-pupae and pupae stages which cause no damage to your lawn, before developing into adults after about 2 months, in late Summer or early Autumn.

lawn grubs


Adult beetles are black and shiny, about 15mm long, with brown serrated legs. The beetles are dormant or semi-dormant through the winter before laying eggs again in spring where the cycle repeats.


Symptoms

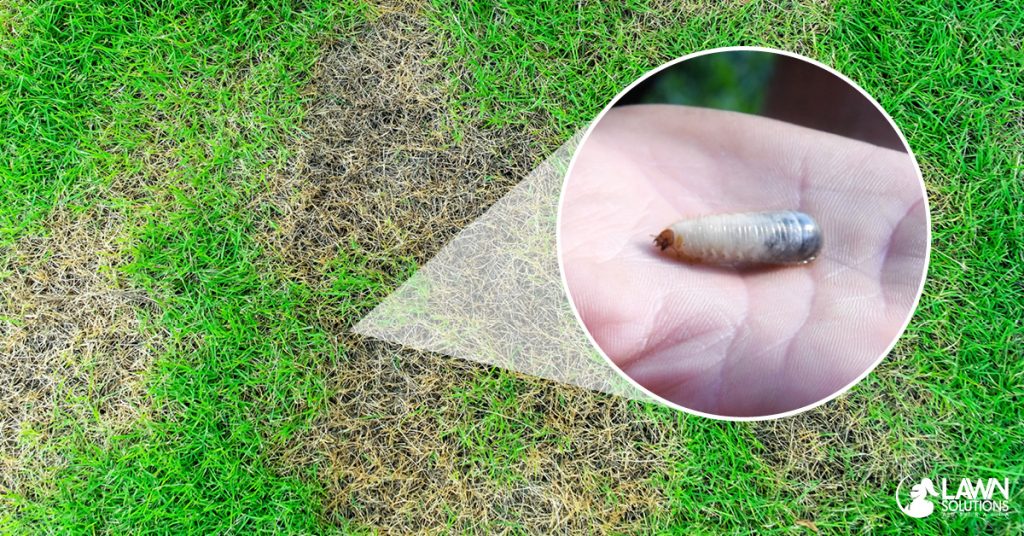
As a result of extensive root damage caused by these larvae, your lawn can no longer take up the moisture and nutrient it requires efficiently. This causes the grass to become dry and straw like, as it would during severe drought conditions.

When at its worst, the grass will actually be able to be peeled back easily from the soil surface as the roots have been eaten away. This is when you will inevitably find a large number of feeding larvae.

Treatment for Lawn Grubs

Due to the rate at which the grubs feed and move across your lawn, the number of eggs they lay, and the sheer numbers involved in an infestation, delaying treatment can be disastrous. Your local turf farmer can supply advice and treatment options.

You can also source fast-acting insecticide products here on our website as well, such as Lawn Solutions Grub Guard or Lawn Solutions Battle Insecticide to get the job sorted quickly and easily. Always remember to follow the manufacturer’s handling and safety instructions.

battle insecticide bifenthrin
BATTLE INSECTICIDE

The most effective time to apply the treatment is as late in the day as possible while the adults are active.

To ensure the grubs are eradicated, apply the treatment again in two weeks. This is an especially important timeframe because eggs take 2-5 weeks to hatch and more grub’s will become present. A re-application at this point will ensure that any missed eggs or grubs are eliminated.

Prevention for Lawn Grubs and Pests

Unfortunately attack by these grubs can happen to any lawn and can occur numerous times during a season.

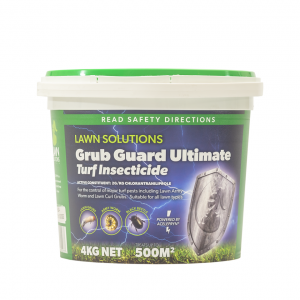
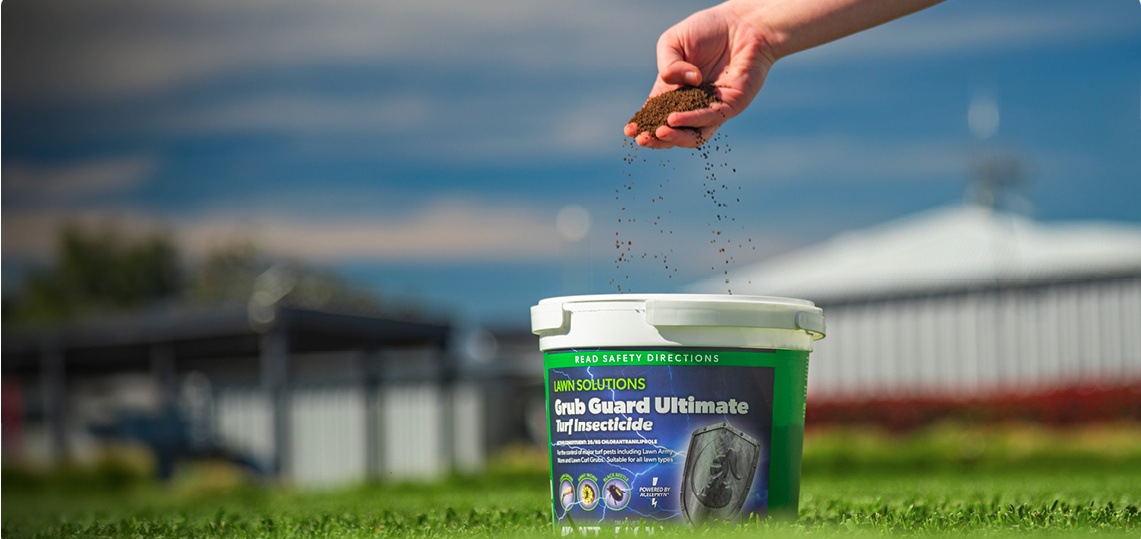
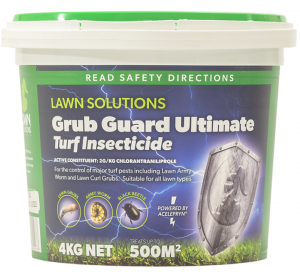
This is why we recommend Grub Guard Ultimate, Acelepryn GR, and Acelepryn Liquid. Acelepryn provides safe and effective control of black beetle while minimising the impact on the environment and non-target organisms, such as bees and earthworms.

Grub Guard Ultimate Acelepryn
GRUB GUARD ULTIMATE

Acelepryn targets pests such as black beetle, stem weevil, cut worm and army worm. The great thing about Acelepryn in comparison to other pesticides, is that it’s preventative. This is why spring is a great time to spread it out and protect your lawn for up to six months.


As always, if you have any more questions please don’t hesitate to contact us for free expert advice on 1800ALLTURF (1800255873) or 07 5543 8304.

Why does my lawn have seed heads?

There has been an increase in seed heads appearing across many turf varieties recently, in most cases this will be due to the seasonal change and is not a cause for major concern.

If your lawn has been fertilised in recent weeks and has sufficient moisture in the soil, they should stop appearing on their own within a matter of weeks.


Seed Heads – When these strange little things start popping up in your lawn it’s common that many people first think they have weeds in their lawn.

seed head

But they are not actually a weed, they are a seed head that has grown from the grass itself.

Normally when a turf variety goes to seed, it’s because it’s under stress from something, usually a lack of water or nutrient. Most common lawn types in Australia produce a sterile seed head, meaning they can’t be spread by seed, only through vegetative sprigs or runners. Although going to seed isn’t a bad thing for your lawn, it doesn’t look great or feel soft underfoot and can be a sign of an underlying problem.

Seed heads can be pretty easy to avoid for the most part, by sticking to a consistent lawn care program. The best way to stop your lawn from going to seed is through regular watering, mowing and fertilising throughout the year.

In most circumstances your lawn will stop going to seed on its own within a couple of weeks or so and it will be business as usual. If there has been dramatic weather change, it will stop seeding once conditions have gone back to normal or once the plant has adjusted. If weather conditions have been fairly consistent, then you will want to look at what it is that may have caused it to go into stress in the first place, like insufficient water, nutrient or soil composition.

If you haven’t had a lot of water or haven’t fertilised in a while, a really good deep soaking and an application with a good quality slow release fertiliser, should put an end to a nutrient or water deficiency and shortly after the grass will go back to normal.

lawn fertiliser
LAWN SOLUTIONS PREMIUM FERTILISER

If your lawn has an ongoing seeding issue and you can’t seem to get on top of it, contact your local turf supplier who can help with some local advice based on your current weather and growing conditions.

A plant growth regulator (PGR) like Primo Maxx will limit your lawns vertical growth and can help reduce the number of seed heads that your lawn produces. Regular mowing, twice a week, and the use of a PGR at full rates will minimise the seed head from flowering.

primo maxx


As always, if you have any more questions please don’t hesitate to contact us for free expert advice on 1800ALLTURF (1800255873) or 07 5543 8304.

How to prepare for a spring lawn renovation

It’s easy to get excited about doing a lawn renovation and all the things you might want to do to have your lawn the envy of the street. The best advice we can give you is to not go too early with any vigorous lawn maintenance activities like dethatching or top dressing. Your lawn needs to be actively growing and performing strongly during the warmer months before undertaking these activities. October long weekend in most states is a good guide.

You can prepare by organising the necessary equipment you need for each step, so you are ready to go when the lawn has started growing strongly again.

Do I need a lawn renovation?

A lawn renovation may be necessary if your lawn has developed a combination of thatch and compaction. It can also be a good time to do so when your lawn is looking unhealthy and specific soil improvements are required to improve the lawns foundation.

A full lawn renovation could be required every 3-4 years. Its not a must to do all the steps, but it can be highly beneficial from time to time if you are looking to achieve the best results with your lawn. Dethatching or top dressing will only be required more regularly if the lawn is a bit neglected. Some turf varieties require more frequent renovations, couch grass for example, depending on the level of inputs and preferred height of cut.

How do I do a lawn renovation?

Making sure you undertake a lawn renovation in the best order will ensure you get the best out of each activity and you get your lawn recovering from winter as quickly as possible.

  1. Weeds removal
  2. Dethatching
  3. Aerating
  4. Fertilising
  5. Top dressing
  6. Watering for recovery

Here is what you need:

  • Knapsack/Pressure sprayer
  • Herbicides like All Purpose Weed Control for weeds treatment
  • Dethatching rake/machine (or hired machine)
  • Manual aerating device, like a garden fork, tine aerator or manual corer (or hired machine)
  • Fertiliser like Lawn Solutions Premium Fertiliser
  • Pre-emergent herbicide like Oxafert
  • Top dressing soil/sand
  • Soil spreader
  • pH test kit
  • Soil amendments if required (gypsum, lime, sulphate of ammonia for e.g)
  • Irrigation or sprinkler

Now that you’re prepared, here are some helpful videos to guide you through the process when the weather warms up:


As always, if you have any more questions please don’t hesitate to contact us for free expert advice on 1800ALLTURF (1800255873) or 07 5543 8304.

Preventing a grub attack | Acelepryn

Armyworm, African Black Beetle larvae (lawn grubs), Cutworm, and other grubs can all quickly cause extensive damage to your lawn. But what if there was a way you could prevent these damage causing grubs from crawling throughout your lawn? Well, Grub Guard Ultimate Powered by Acelepryn is your answer!

Prevention is the best solution

Grubs will often target the healthiest looking lawn on the street as their next tasty meal. When lawns get attacked by grubs, they often will have already created extensive damage before being noticed. Following an attack, the lawn can take a few weeks or a few months to fully repair itself. Instead of going through the long process of nursing your lawn back to health, prevention is a far better solution.

What is Grub Guard Ultimate?

Grub Guard Ultimate Powered by Acelepryn is an insecticide that provides your lawn with 6 months of protection from grubs and caterpillars like Armyworm in one single application. Grub Guard Ultimate works by targeting a specific muscle receptor that is common with damaging causing insects. Other non-target organisms like bees, earthworms, birds, fish, and mammals don’t use the same muscle receptors, making it one of the safest insecticides on the market!

GRUB GUARD ULTIMATE
Acelepryn liquid
ACELEPRYN LIQUID

When should you apply Grub Guard Ultimate?

As a general guide, Grub Guard Ultimate is best used in September/October and March/April to prevent a grub attack year round. One application of Grub Guard Ultimate will provide you with protection for up to 6 months. So, two applications per year will ensure your lawn is protected from grubs throughout the whole year.

How to apply Acelepryn based products?

For treating beetle larvae including African black beetle, Argentine Scarab, Argentine Stem Weevil larvae and Billbug Larvae, spread the granules evenly, 1-2kg per 100m2. We recommend using a calibrated spreader to ensure the granules are spread evenly to the lawn. You can also spread the granules by hand. After the granules have been spread out, give the granules a water in with a minimum of 3mm irrigation.

For Caterpillars including Cutworm, Armyworm, and Sod Worm, spread the granules evenly, 1kg per 100m2. Again, we recommend using a calibrated spreader for an even application. You can also spread the granules by hand. After application, delay mowing and watering for 24 hours. After 24 hours have passed, water the granules in.

Acelepryn Liquid

For treating Lawn Curl Grub (Beetle larvae including: African Black Beetle larvae Argentinian Scarab larvae), Argentine Stem Weevil larvae and Billbug larvae, you can apply through a garden sprayer or watering can. For a garden sprayer use 8 – 15 mL per 5-10 L of water per 100 m2. Wheh applying with a watering can, mix 1.5 mL in 9 L of water and evenly apply to 10 m2. Apply the higher rate for up to 6 months residual protection, cases of high pest pressure, and late in season when mature grubs are present. Lightly water in immediately after application when applying by garden sprayer.

Acelepryn Liquid 100ml

Acelepryn 10kg

For treating Caterpillars including Lawn Armyworm, Black Cutworm, and Sod Webworm, apply through a garden sprayer. Use 8 mL per 5-10 L of water per 100 m2. To ensure optimum control, delay watering or mowing for 24 hours after application.

spreading fertiliser

Common signs of grubs

When grubs are present in your lawn, they will eat through your lawn’s roots. As the turf can then no longer absorb nutrients, the grass will become dry and straw like. When there is an infestation, large areas of the lawn will be affected quickly.

How do I know if my lawn has grubs?

If you think your lawn may already have grubs, it is best to do a quick lawn grub test. To do this, mix a bucket of soapy water and pour it over the edge of an affected area. Keep an eye on it and after about 10 minutes or so, usually if there are grubs there, they will come to the surface. This is best done at dawn or dusk when grubs are most active.

Lawn Grubs
BLACK BEETLE LARVAE

What to do if you already have grubs?

If your lawn already has a grub infestation, it is best to act quickly to help prevent further damage. Delaying treatment can cause a substantial amount of damage as the grubs will move fast along the lawn while laying eggs and increasing in numbers.

After you have identified there is an infestation, we recommend using a fast-acting product for a quick knockdown. We recommend using Lawn Solutions Grub Guard or Battle Insecticide to get the job done quickly. When using insecticides, it is always best to check the label for application and safety instructions.

The best time to apply the treatment is in the late afternoon/dusk when the lawn grubs are most likely to be active. To ensure you have treated the full lifecycle of the grubs, apply a second treatment in 2 weeks. This will help ensure that any eggs that may be in the lawn have been treated, avoiding a second attack. If you do still see these grubs after this, reapply every 2 weeks until they are gone.

Grub Treat and Protect Bundle

Protect your lawn from lawn pests with this one-two punch to treat an existing infestation and to protect your lawn for up to 6 months. If you have noticed damage to your lawn caused by black beetle larvae or Army worm, this bundle provides Battle Insecticide for a fast knock-down treatment, along with Grub Guard Ultimate – the best product on the market for lawn pest prevention in lawns.

grub treatment bundle

As always, if you have any more questions please don’t hesitate to contact us for free expert advice on 1800ALLTURF (1800255873) or 07 5543 8304.

How Early Is Too Early to Mow in The Morning?

Did you know there is such a thing as too early to mow? Here at Lawn Solutions, we believe there is no better sound than a mower starting up on a Saturday morning, but your neighbours might disagree! In this blog, we look at what time each state allows you to start up your mower to help you keep the peace between you and your neighbours.

Just like power equipment and construction noise in residential areas, there are permitted hours for each region to run your mower. Your local environmental protection agency often puts these noise regulations in place to help ensure your neighbours are not woken up at dawn and can get a good early night’s sleep.

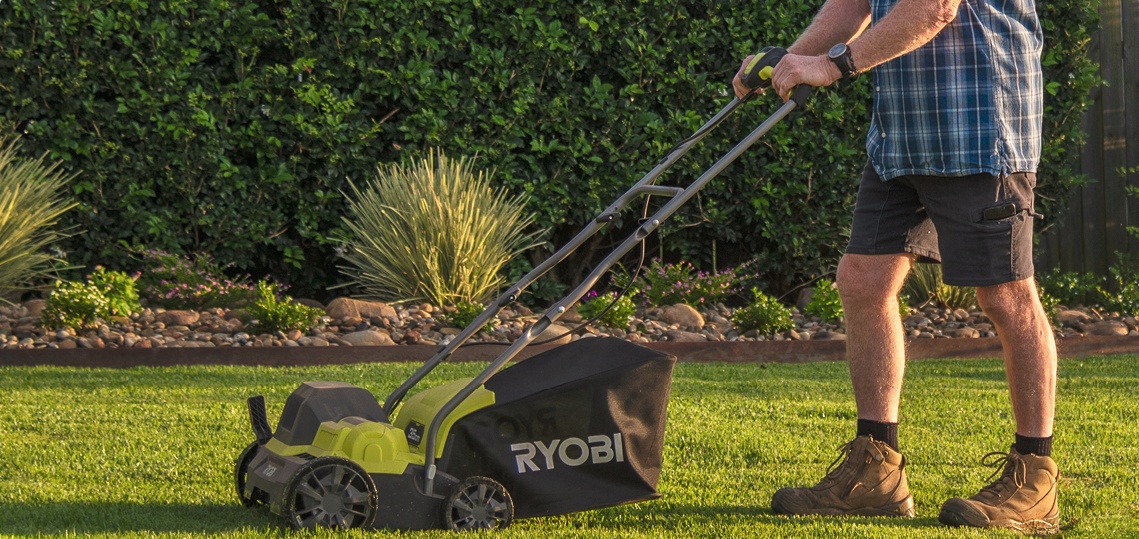
mowing

So, what are the regulations for your state? Let’s take a look…

New South Wales

In NSW, mow between 7am to 8pm Monday to Saturday. On Sundays and public holidays, you can mow between 8am to 8pm. In NSW these rules have been set out by the NSW Department of Planning and Environment.

Queensland

The Environmental Protection Act 1994 in QLD states that you can mow your lawn between 7am to 7pm Monday to Saturday. On Sundays and public holidays, mow between 8am to 7pm.

regular mowing

Victoria

In Victoria, you can mow Monday to Friday between 7 am to 8pm. You can mow between 9am – 8pm on Saturday, Sunday and public holidays, according to the Environmental Protection Authority Victoria.

South Australia

In South Australia, you can mow between 7am to 7pm Monday to Saturday and from 9am to 7pm Sunday and public holidays. These rules have been set out by EPA South Australia.

Tasmania 

In Tasmania, you can mow between 7am to 8pm Monday to Friday. On Saturdays you can mow between 9am to 8pm and Sundays and public holidays between 10am to 8pm. These rules have been set out by EPA Tasmania.

Northern Territory 

In the NT, you can mow between 7am to 8pm Monday to Saturday and 8am to 8pm Sunday and public holidays, according to the NT EPA.

Canberra

In the ACT, lawn mowing can be done 7am to 8pm Monday to Saturday and 8am to 8pm Sundays and public holidays, according to Access Canberra.

Western Australia

In WA, generally lawn mowers can be used between 7am to 7pm Monday to Saturday and 9am to 7pm Sundays and public holidays. This is for most regions within WA.

Mowing Tips

Now that you have got what time you can mow down packed let’s take a look at a few tips on how you can sure you get the best cut:

  • Mow regularly enough so that only one third of the leaf is removed with each pass.
  • Ensure your mowers blades are nice and sharp.
  • Mow when the lawn is dry and try to avoid mowing when the lawn is wet.
  • Mow at the same length and keep it consistent.
  • Switch mowing directions.
  • Mow in the mornings or afternoons. Avoid mowing in the middle of the day.
  • Keep at a consistent pace.

mowing fun

As always, if you have any more questions please don’t hesitate to contact us for free expert advice on 1800ALLTURF (1800255873) or 07 5543 8304.

When Should I Apply a Pre-Emergent Herbicide?

Pre-emergent herbicides are fantastic products to add to your lawn care regime. With these herbicides, your application timing can impact how well it will work to prevent weeds in your lawn. In this blog, we look at the optimal times throughout the year to apply a pre-emergent to get the best results.

How Does a Pre-Emergent Work?

Pre-emergents work by targeting weed seedlings during germination. They create a barrier at the soil level that affects the germination of any new seedlings. This means they will target weeds before they appear but will not be effective after weeds have started growing.

pre-emergent

Why Should I Time My Application?

As pre-emergents work by targeting weeds before they appear, you will need to time your application just before weeds are set to start growing in your lawn. If you can create the barrier at the soil level before the weeds are set to start growing, you can stop them during their germination phase.

When to Apply a Pre-Emergent for Seasonal Summer Weeds?

Some seasonal summer weeds that pre-emergents will help target include Summer Grass, Crabgrass, and Crowsfoot. Seasonal summer weeds will start to germinate when the soil temperatures begin to warm back up, usually when the average soil temperature is above approximately 14 degrees. So, it is best to get your application down before the temperatures are set to rise in your region. The exact time for your application will change depending on your location and temperatures in your region. As a guide, this will usually occur around early to mid-spring.

When Should I Apply a Pre-Emergent for Seasonal Winter Weeds?

Pre-emergents can also be used to help prevent seasonal winter weeds, including Winter Grass. Seasonal winter weeds will start to germinate once the average soil temperatures start to drop below approximately 14 degrees. Therefore, it is best to get your application on just before this is set to occur. Like prevention for summer weeds, the exact time this will occur will depend on your location and temperatures in your region. As a guide, this will usually happen around mid to late autumn.

pre-emergent

What Pre-Emergent Should I Use?

When it comes to using pre-emergents, we recommend using our Lawn Solutions Oxafert Pre-Emergent Herbicide and Fertiliser. Oxafert comes in a handy 3kg bag that will treat up to 100m2. It is safe for most warm season turf types, including Sir Walter DNA Certified, TifTuf Hybrid Bermuda, Sir Grange, Zoysia Australis and Kikuyu. This product also contains a balanced ratio of nutrients to help boost your lawn for healthier all-round turf. Oxafert will remain active on your lawn for up to 12 weeks, for protection of seasonal weeds.

oxafert
OXAFERT PRE-EMERGENT

What Weeds Will Oxafert Target?

Oxafert will help control the germination of Winter Grass, Summer Grass, Crowsfoot, Creeping Oxalis and Crabgrass.

What Should I Use for Weeds That Are Already Growing?

If you already have weeds growing in your lawn, it is best to get on top of them as soon as possible to help prevent their spread. Whem there are only a few weeds growing throughout your lawn, hand removal is an effective option. If the weeds are more widespread and there is too much to remove by hand you may need to look at using an herbicide for removal. For removing common broadleaf weeds like Clover, Bindii, Creeping Oxalis, Cudweed and Thistles, we recommend using a broadleaf herbicide like our All Purpose Weed Control.

weed control
ALL PURPOSE WEED CONTROL

As always, if you have any more questions please don’t hesitate to contact us for free expert advice on 1800ALLTURF (1800255873) or 07 5543 8304.